Customize confirmation messages and redirect links
Tabs
With FormCan, you can make your forms personalized by setting up special confirmation messages and redirect links based on what people enter. This guide will show you how to do it, using the example of students picking their majors.
Access form settings
To access the Form Settings window, you have two options:
- Option 1:
-
On the Dashboard, hover over to the desired form.
-
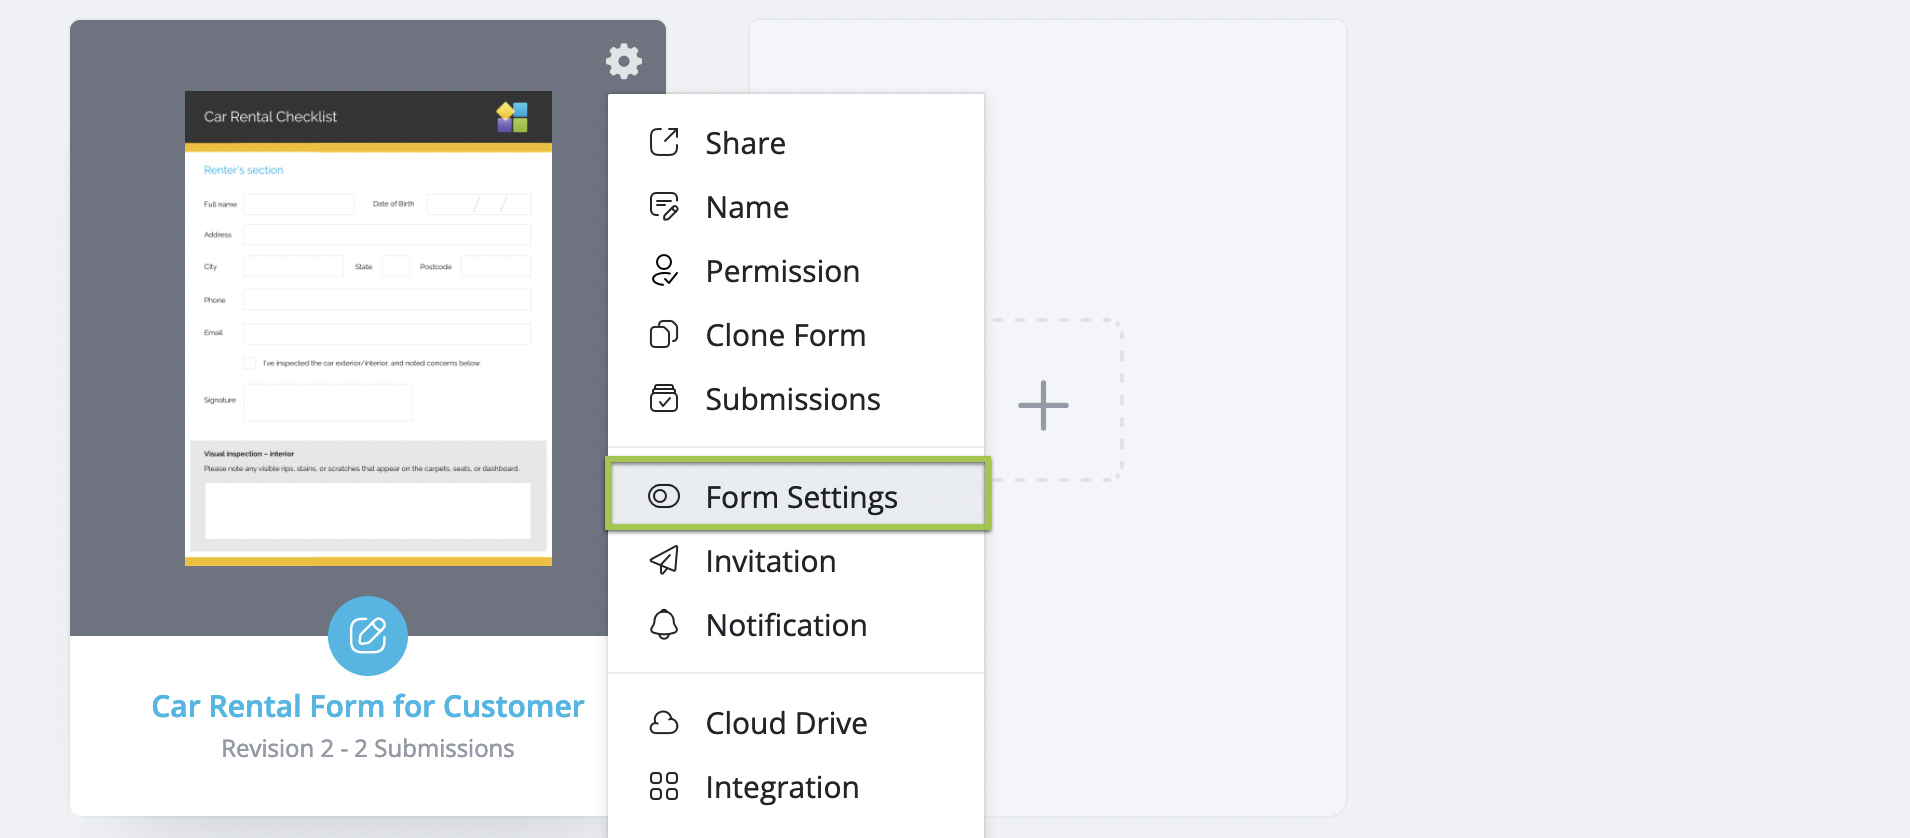
Click the Settings (gear) button on the top left corner and then select Form Settings.

- Option 2:
On the top left of the form builder, the dot (•••) icon and select Form Settings.

Set up confirmation messages and redirect links
-
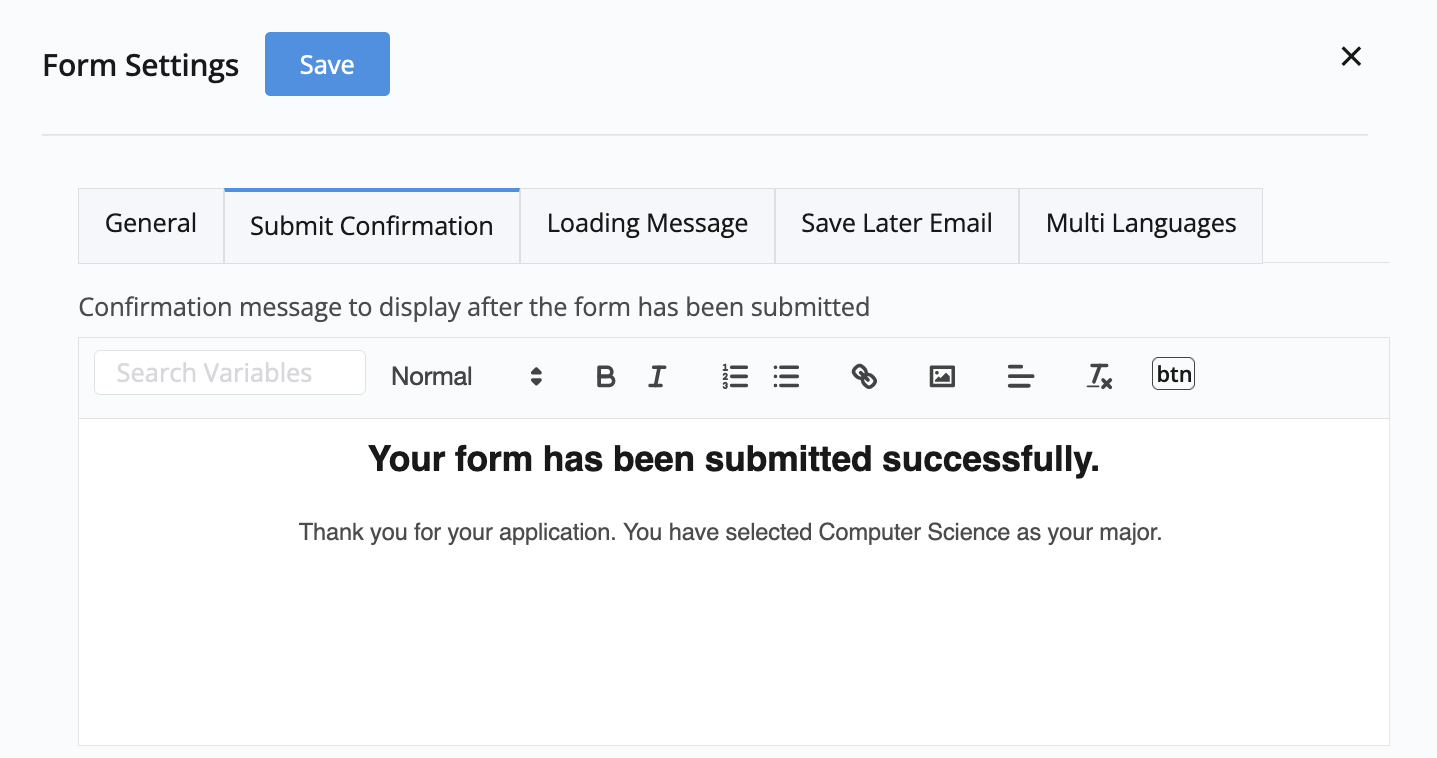
Within the Form Settings panel, select the Submit Confirmation tab.

-
Customize your confirmation message or redirect link.
-
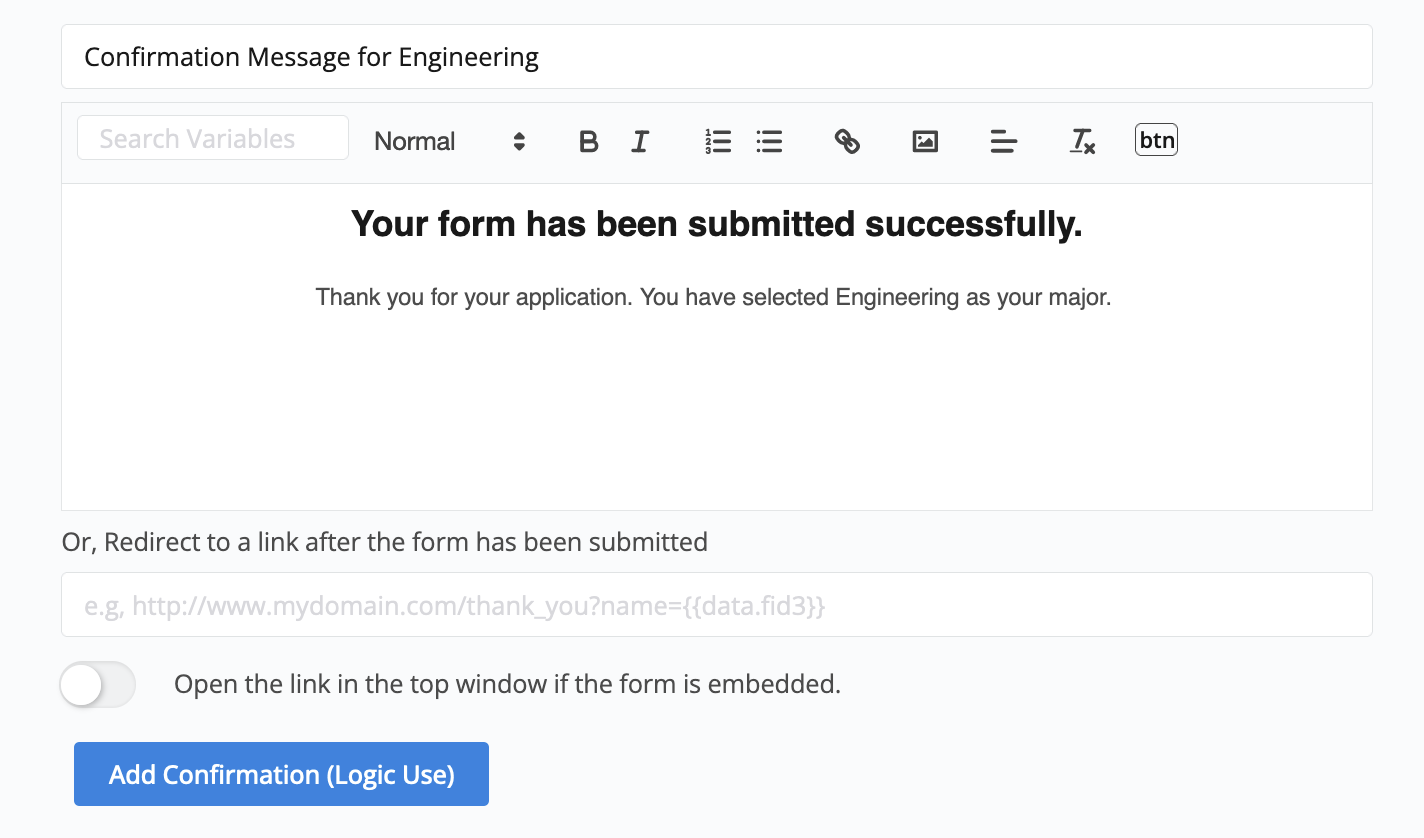
Click the Add Confirmation (Logic Use) button to make a new set of settings. Keep doing this until you’ve set up all the options you need.
 Example
You’re creating a form for student enrollment applications, and you’ve added a Dropdown field where students can select their major, “Computer science” or “Engineering”. Depending on the major they choose, the form will show different confirmation messages or redirect them to different links.
-
Give each set of settings a name, then click Save to keep your changes.
Apply conditional logics
-
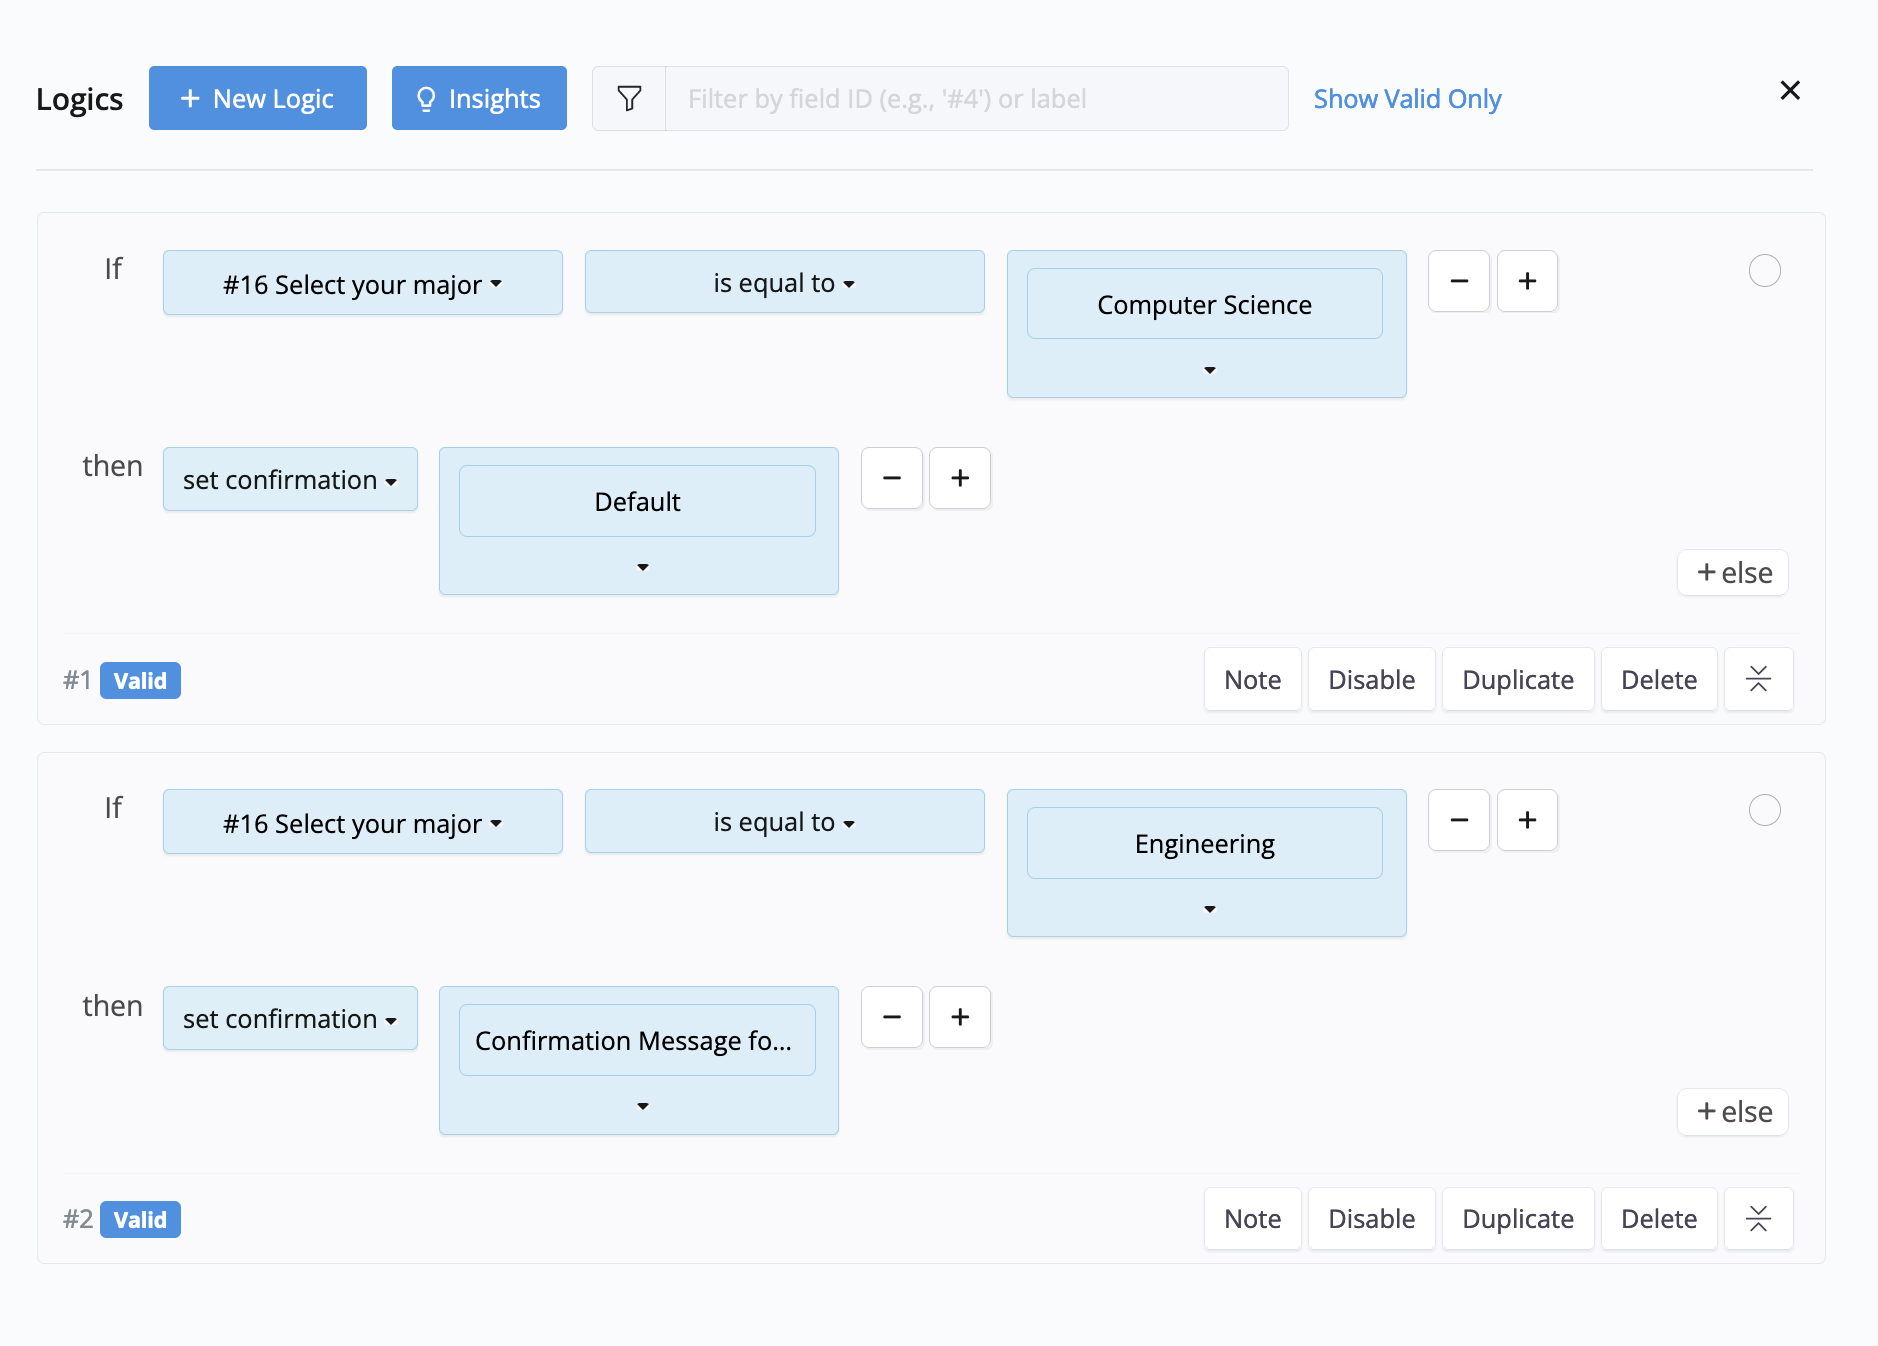
Return to the form builder and open the Logics panel.
-
Set up logics to determine which confirmation message or redirect link to show based on the student’s selection.
ExampleFor instance, if a student picks “Computer Science”, set the confirmation to
Default. If they choose “Engineering”, set it to theengineering-specific message.
Before publishing your form, be sure to test it to ensure that the confirmation messages or redirect links work as expected.
