Create an invitation
Tabs
Once you’ve published a form, you can invite your audience to fill it out.
Choosing the right invitation method
You can create invitations through either the Dashboard or the Workflows page. Select the method that suits your needs:
-
Dashboard: Quick and simple invitations, ideal for individuals or one-time events.
-
Workflows: Incorporate invitations into established workflows, suitable for complex or organized processes. Ensure that form invitations are automatically triggered as part of a step-by-step series of actions.
Create an invitation from Dashboard
To create invitations on a case-by-case basis, follow these steps:
-
Go to the Dashboard and select your desired form.
-
Click the Settings (gear) button at the top right of the form, then click Invitation.
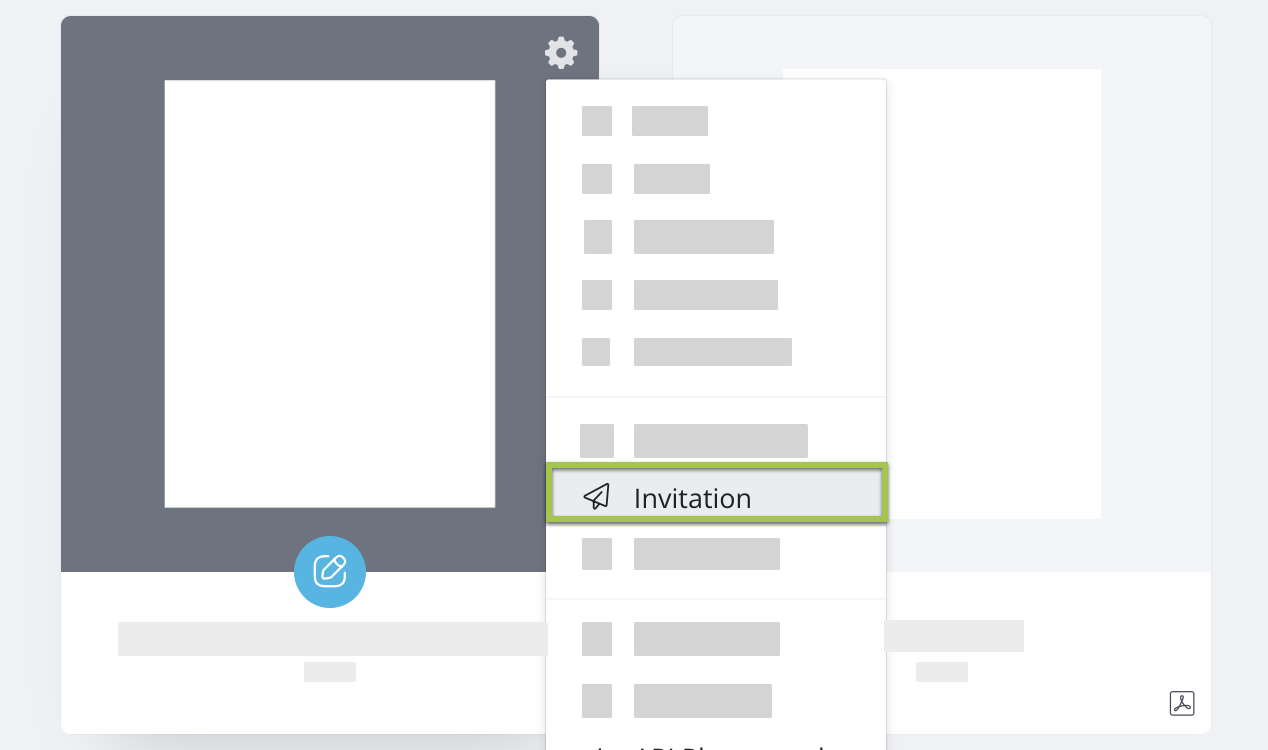
You will open the Invitation panel.
Create an invitation from Workflows
To trigger form invitations as part of a larger workflow that involves multiple steps and participant, follow these steps:
-
Go to the Workflows page.
-
Click Invitation on the top right of the page.
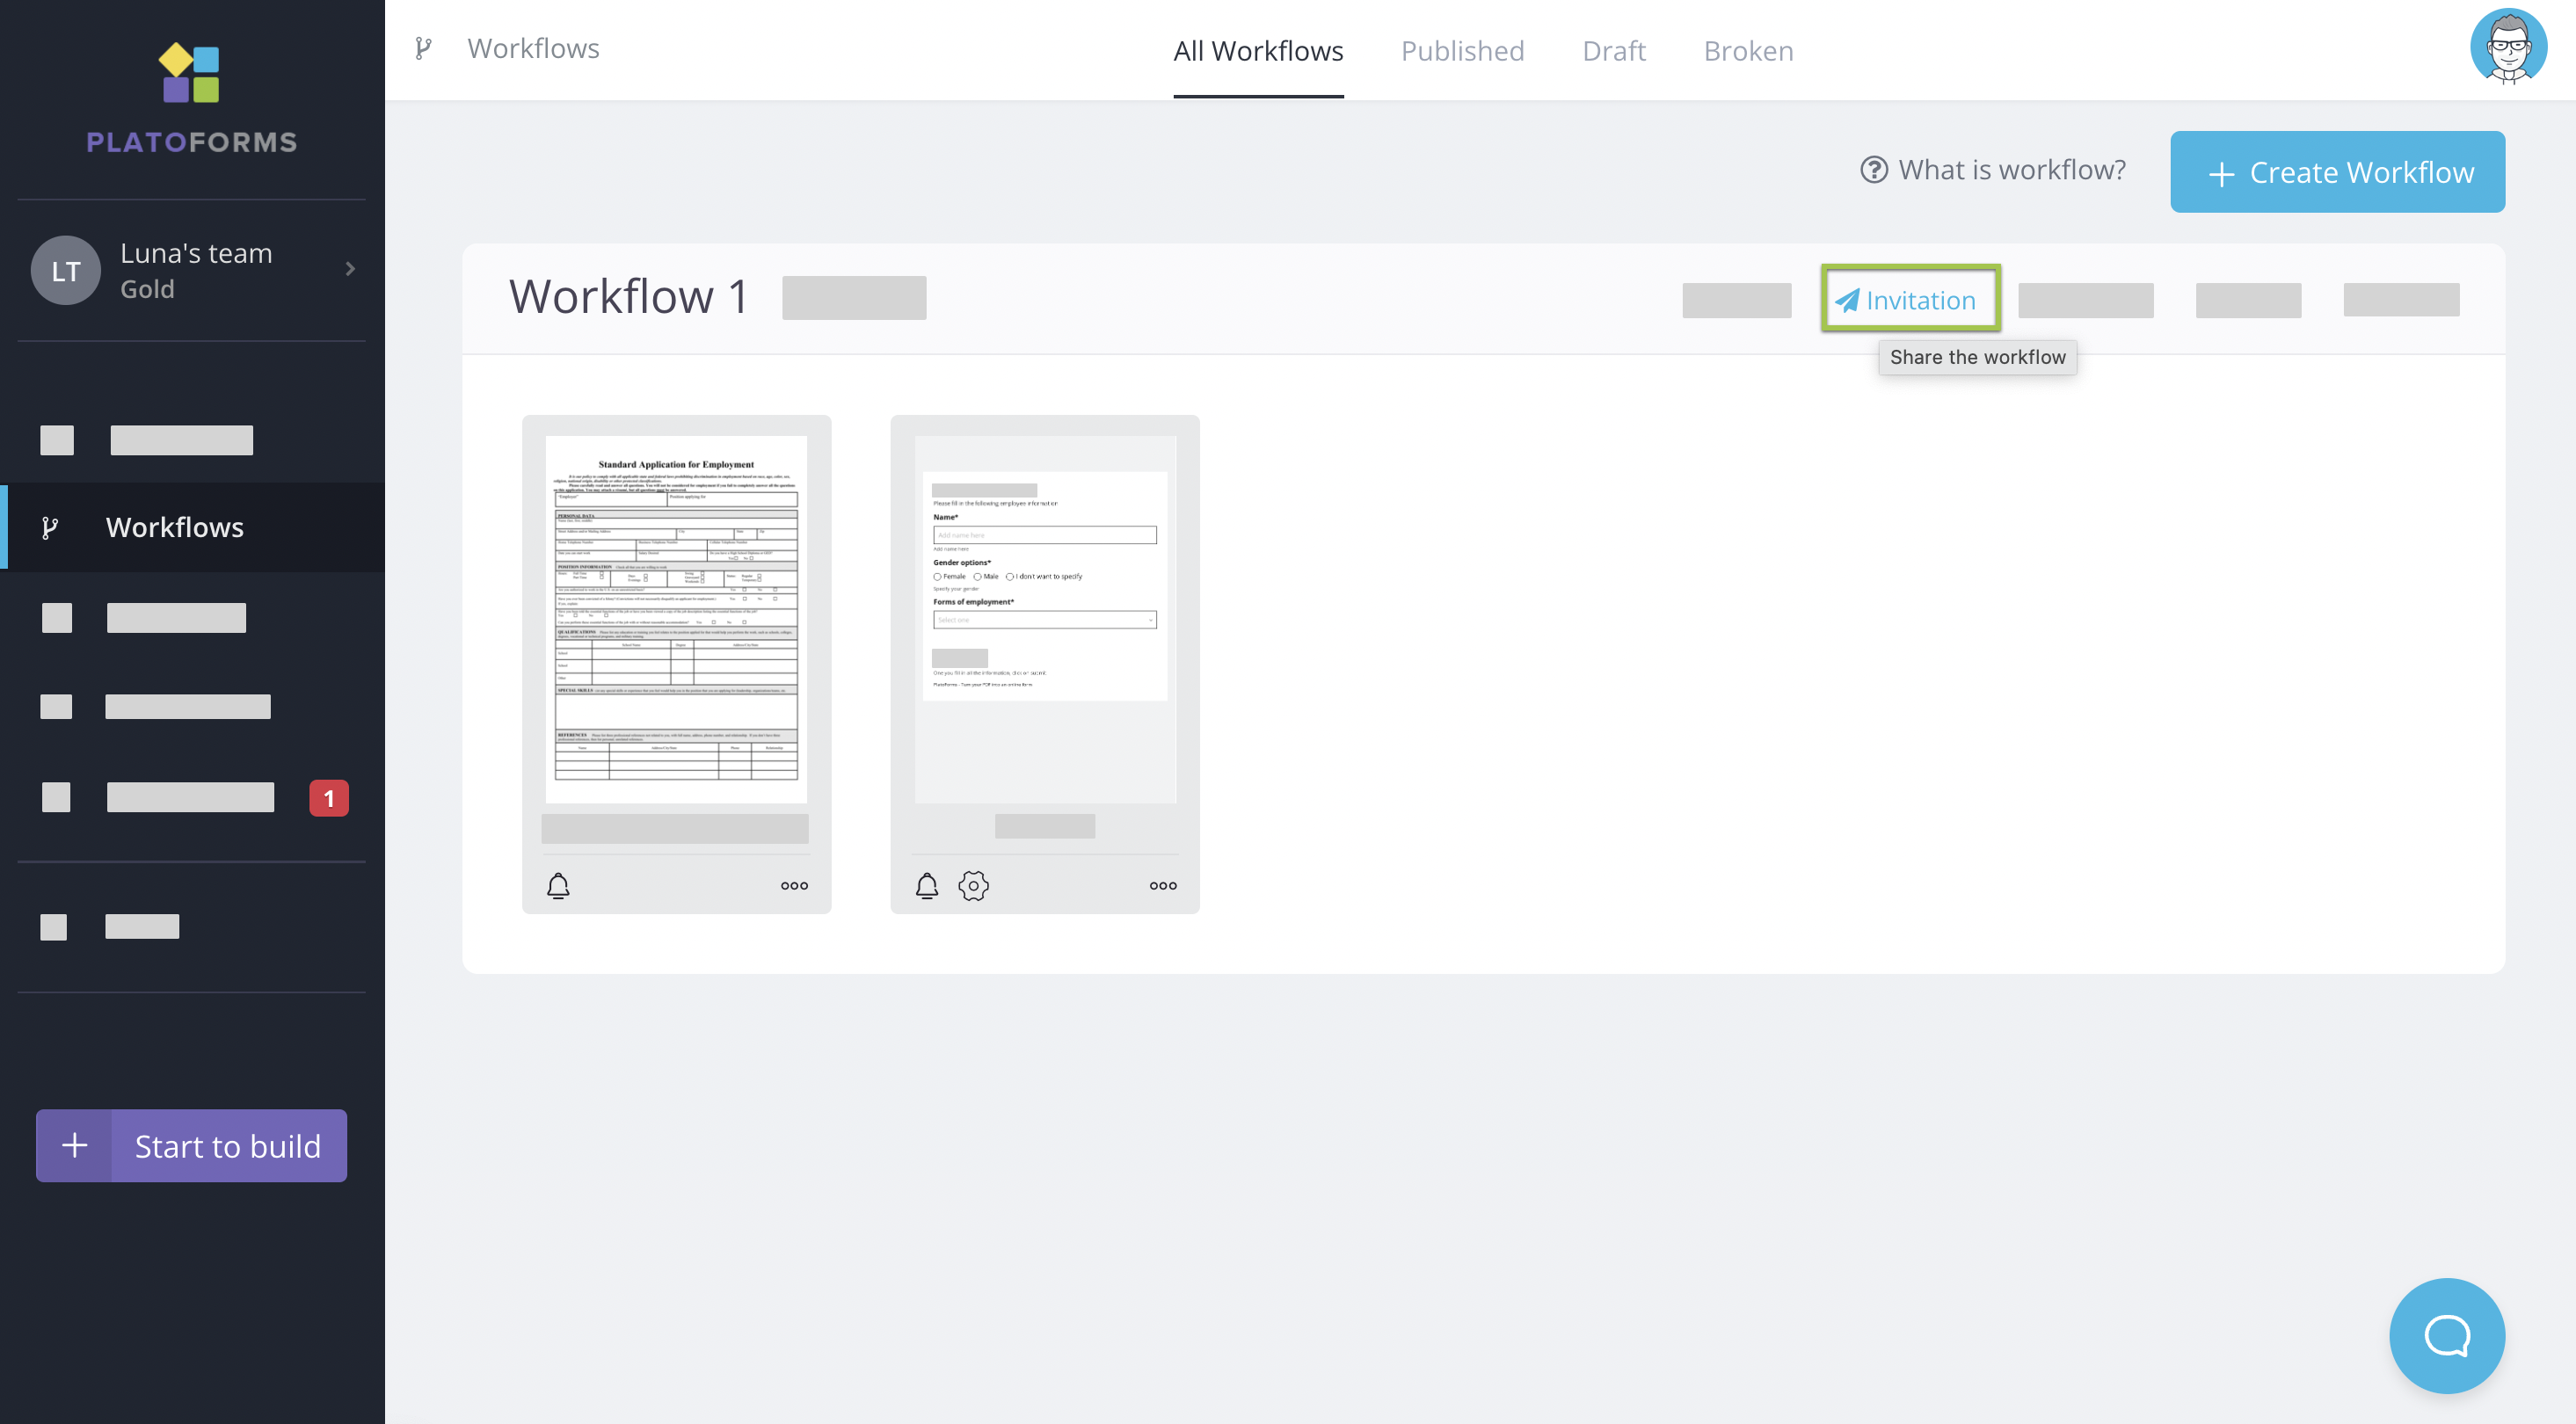
You will open the Invitation panel.
Set your invitaion
On the Invitation panel, set your preferences. For more details, refer to the sections below.
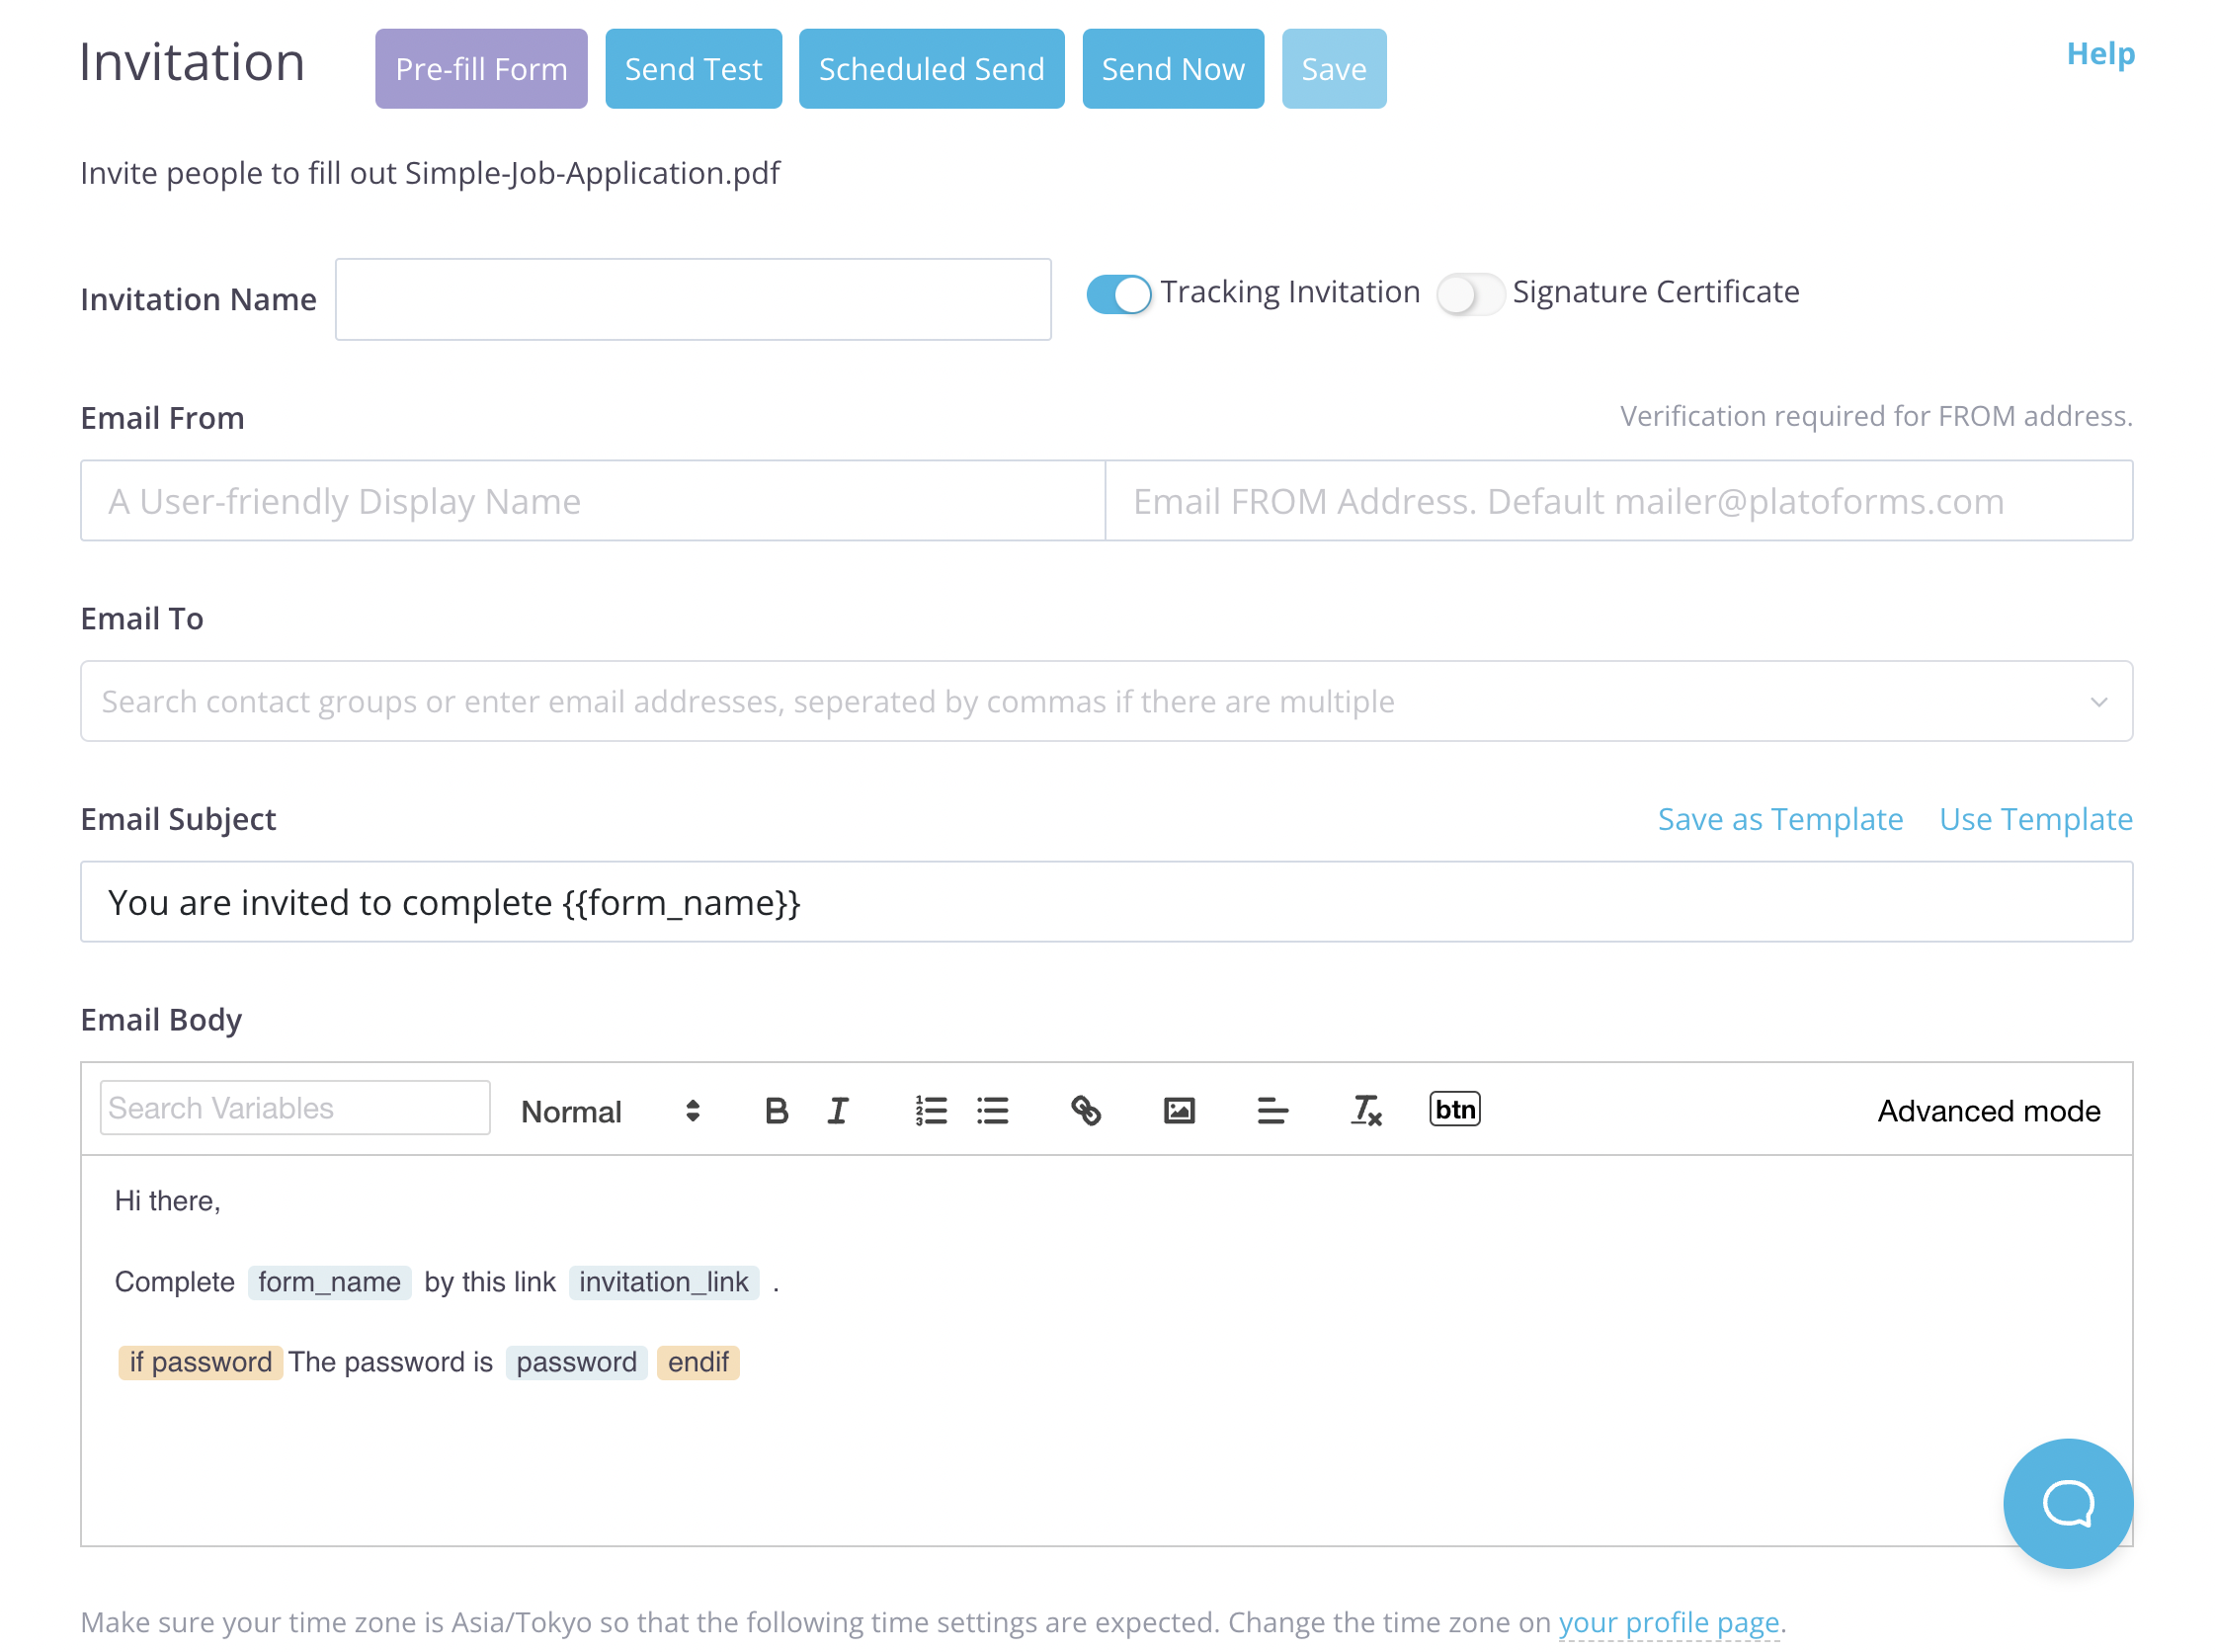
Track invitations
Enable or disable the Tracking Invitation option according to your needs.
![]()
-
When Tracking Invitation is disabled, sent invitations won’t be stored, offering limited control compared to the tracking-enabled mode.
-
With Tracking Invitation enabled, from the Invitation panel, you can:
When Tracking Invitation enabled Availble settings Specify an Invitation Name for record keeping. 
Save the invitation edits. 
Enable Signature Certificate. 
Schedule a specific date and time for sending the invitation. 
Add password protection. 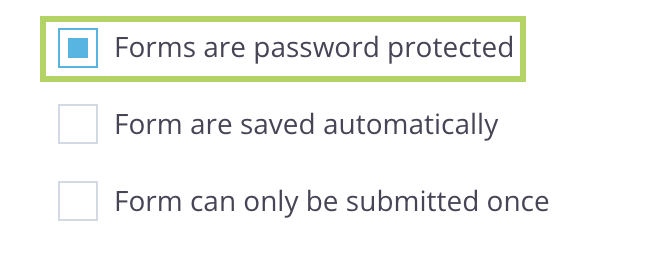
Save the respondent’s edits. 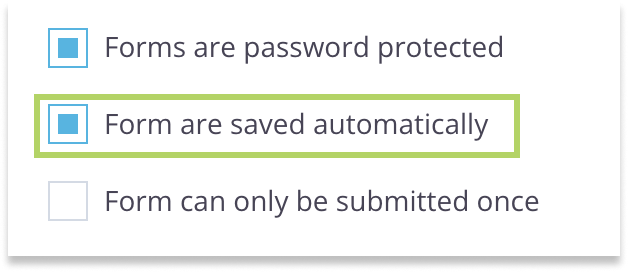
Choose whether the form can be filled multiple times. 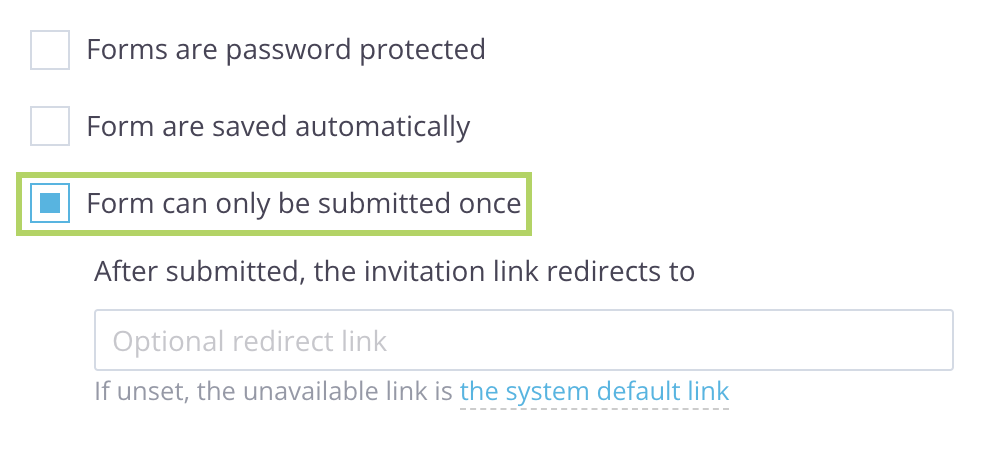
Configure email addresses
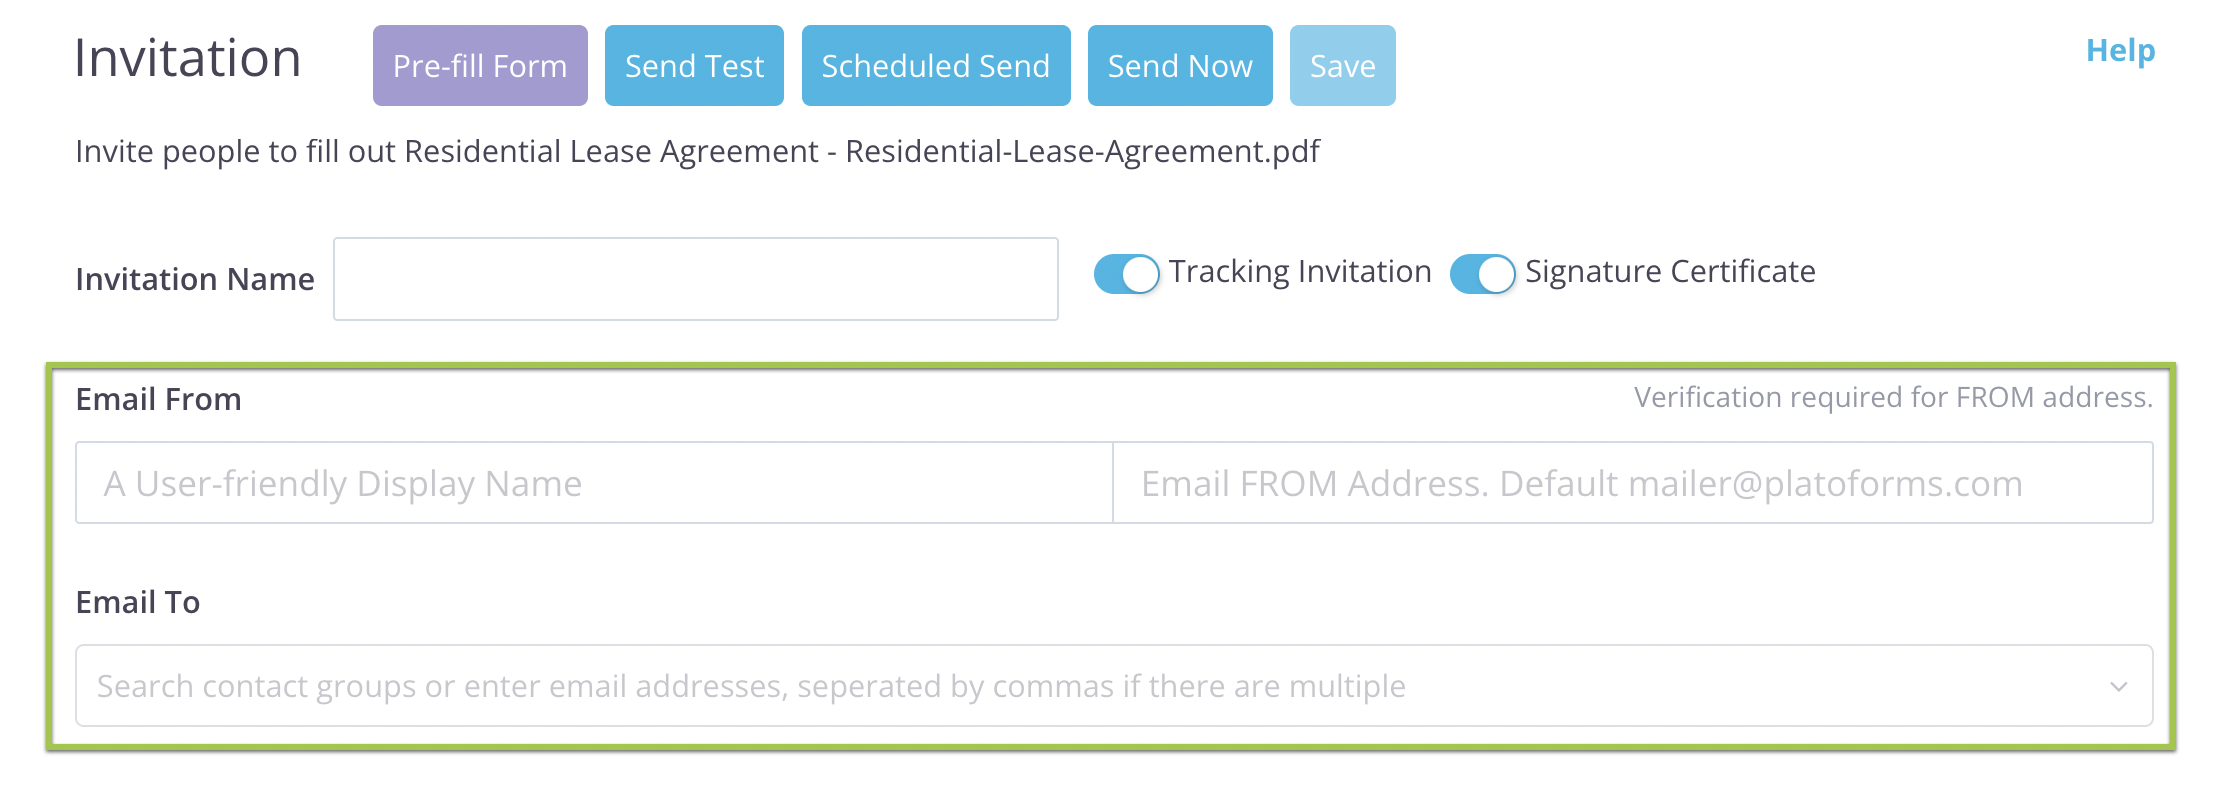
You can set up two types of e-mail addresses:
- Sending address (Email From).
- Receiving address (Email To).
-
Email From
This is the sender details, including the Display Name (sender name) and Email From Address (the email address to use as the sender). The default Display Name is “Mailer,” and the default Email From Address is “[email protected]”.
To customize the sender details:NoteThis verifies individual email addresses. For example, if you verify [email protected], only that precise address can be used for invitations.
-
Upgrade to a premium plans.
-
On the Invitation panel, enter your custom Display Name and Email From Address.
-
Click on This Email Only.

A verification email will be sent to the email address you entered. -
Check your email inbox for the verification message and follow the instructions in the verification email to complete the process.
Once verification is successful, you can use the customized sender details to send invitations.
NoteYou can also verify the whole email domain to use any email address under it, refer to the Send email with custom domain section.
-
-
Email To
Enter up to 5 email addresses, separated by commas. For sending to more recipients, please upload contacts on the Invitations page in advance.
Customize email content
You can customize your email content by customizing the default title and message.
-
In the Email Subject field, edit your title with
{{form_name}}. See the example below:

-
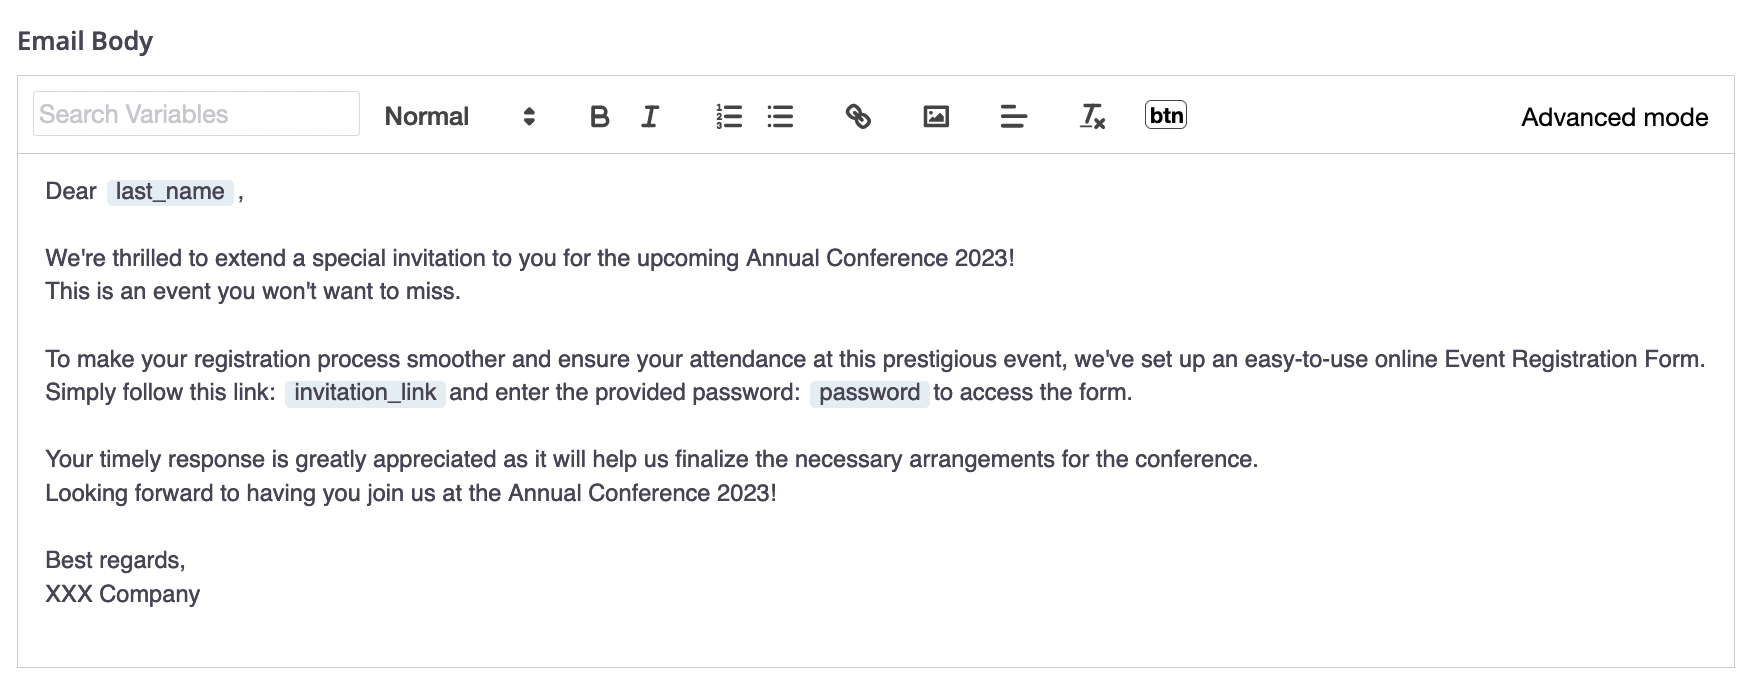
In the Email Body input box, write your email and select the desired variables from the Search Variables dropdown list. See the example below:
 Note
NoteFor more details, refer to the Variables in email body section below.
This is the recipient’s view:
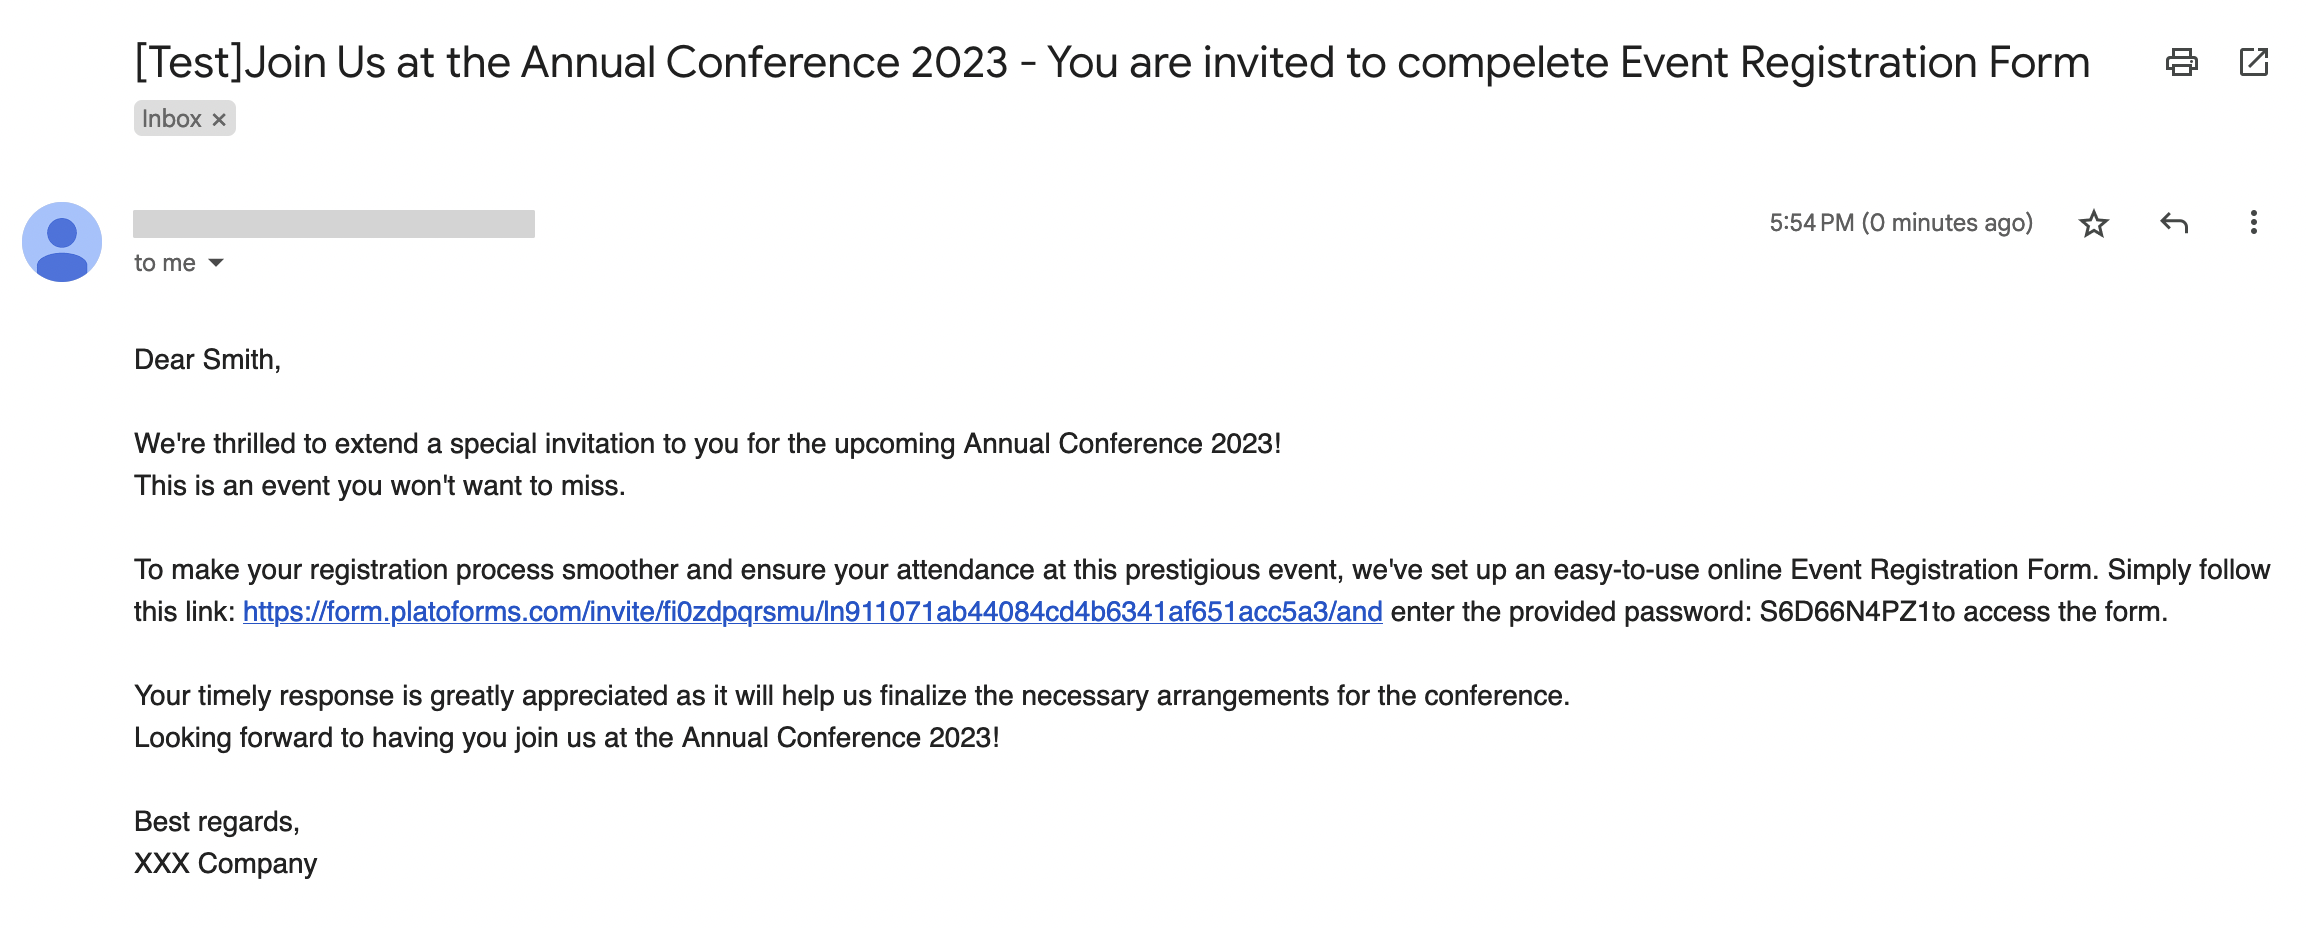
Variables in email body
When creating your Email Body, you can select from a range of variables available in the Search Variables dropdown list.

- first_name: Insert the first name of the contacts.
- last_name: Insert the last name of the contacts.
- invitation_link: Includes the invitation link in the email for recipients to access and submit the form.
- password: Include the automatically generated password for accessing the form. To utilize this variable, ensure you scroll down and enable the Forms are password protected option.
- form_name: Show the name of the particular form you are sending to the recipient.
- password logic: A conditional statement that displays the password if the Forms are password protected option is enabled.
Secure form with password
To create a password for your clients to access the form, follow these steps:
-
In the Invitation panel, enable the Tracking Invitation option.

-
Scroll down and check the Forms are password protected option.

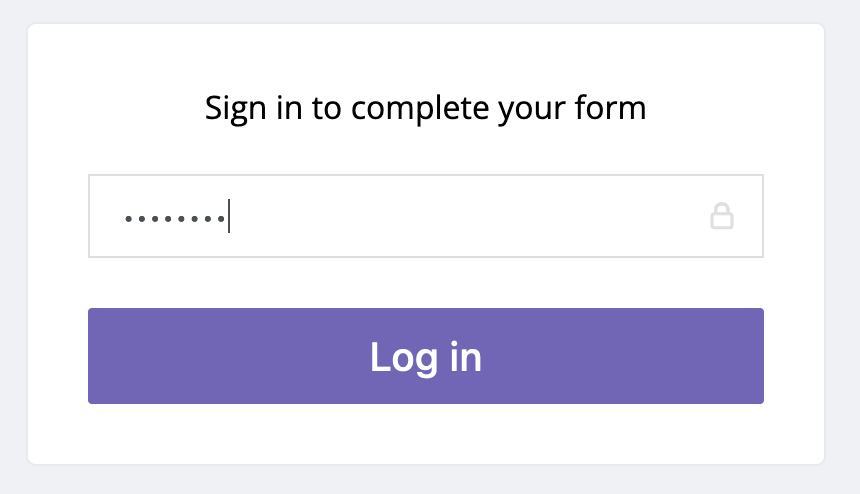
After you’ve send the invitation to your client, they’ll get an invitation email with the password.

They’ll need to use the password to access the form.
Create and reuse a template
You can save form invitation settings as templates to streamline the process of creating similar invitations for your team.
Create a template
-
After you’ve configured everything for the template, click Save as Template.

-
Name the template and click Create.

Reuse a template
-
Go to the Dashboard and select your desired form.
-
Click the Settings (gear) button at the top right of the form, then click Invitation.
-
In the Invitation panel, click Use template and choose the desired template by name.

Send now or schedule

- For immediate sending, click Send Now.
- For scheduling future delivery, click Scheduled Send. You can set a date and time within the next 30 days.
Track invitation records
After sending the invitation, access your invitations record from the Invitations page to:
- View Invitation details like recipient’s email and sending time.
- Use the Action column to view, copy, or delete specific invitations.

For more details, check the Manage invitations section.
