Integrate with Zapier
Tabs
This article explains how to streamline your workflow with Zapier integration.
About Zapier integration
What is Zapier?
Zapier is a popular tool that automates tasks by connecting different software tools. It sets up triggers to start automated workflows, making tasks like data entry more efficient.
Why integrate with Zapier?
Integrating FormCan with Zapier provides automation benefits, including data transfer to apps like Google Sheets and Slack, instant notifications, enhanced collaboration, customized workflows, and increased efficiency by eliminating manual data entry.
How does the integration work?
-
Form Submission Success: When a form is successfully submitted, FormCan generates a corresponding PDF.
-
Trigger Zapier Flow (Zap): This PDF triggers a Zapier flow, automating actions across your integrated apps.
Prerequisites
Before you can connect your online forms with Zapier, make sure you’ve already created a Zapier account.
Integrate with Zapier
The following steps introduce how to integrate FormCan with Zapier to automatically save new submissions to Google Sheets.
Authenticate from FormCan
-
Go to the Dashboard and select your desired form.
-
Click the Settings (gear) button at the top right of the form, then click Integration.

-
In the window that opens, select the Zapier logo.

You’ll find a list of applications you want to connect with Zapier.
-
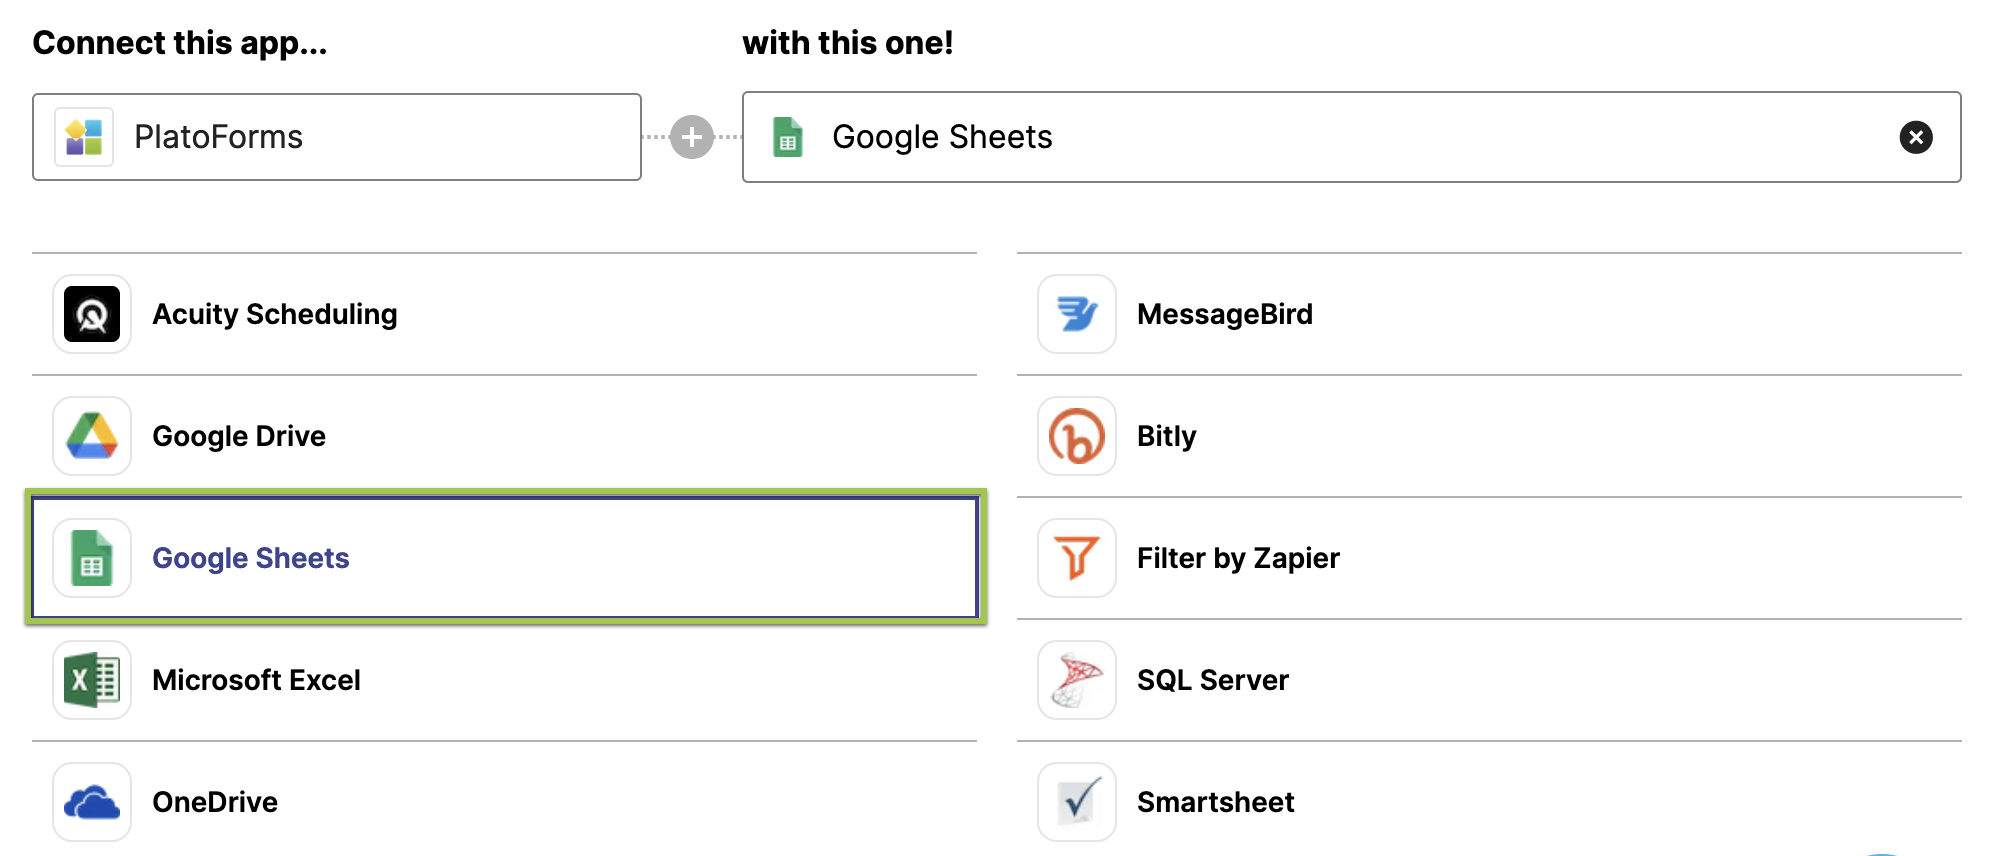
Select Google Sheets from the list.
-
Scroll down and locate the “Save new submissions” option, then click Use this Zap.

You’ll be prompted to log in to your Zapier account.
-
Follow the instructions to log in and set up.
-
After finishing set up, sign in your FormCan account form the Zapier dashboard.

Configure integration settings
-
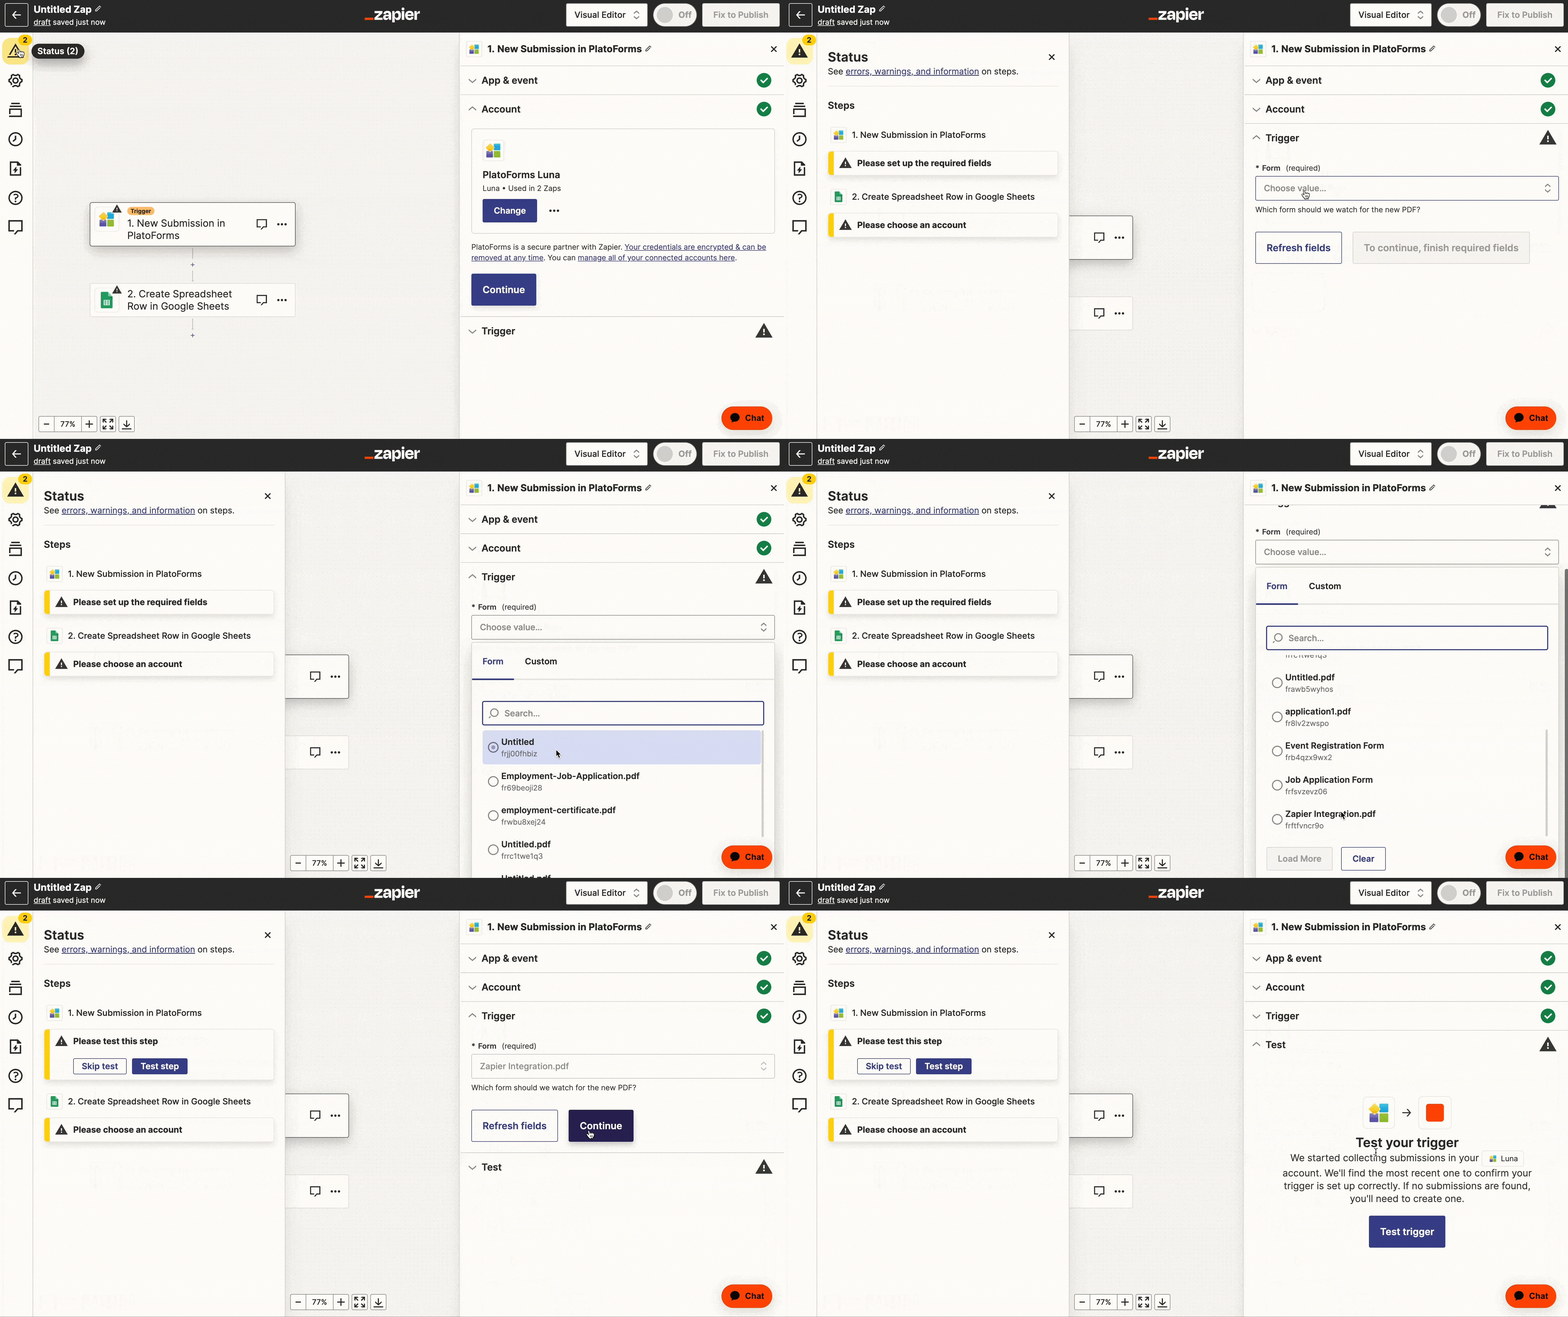
After authorization, in the New Submission in FormCan panel on the right, follow the instructions on the interface to set up the required fields.
-
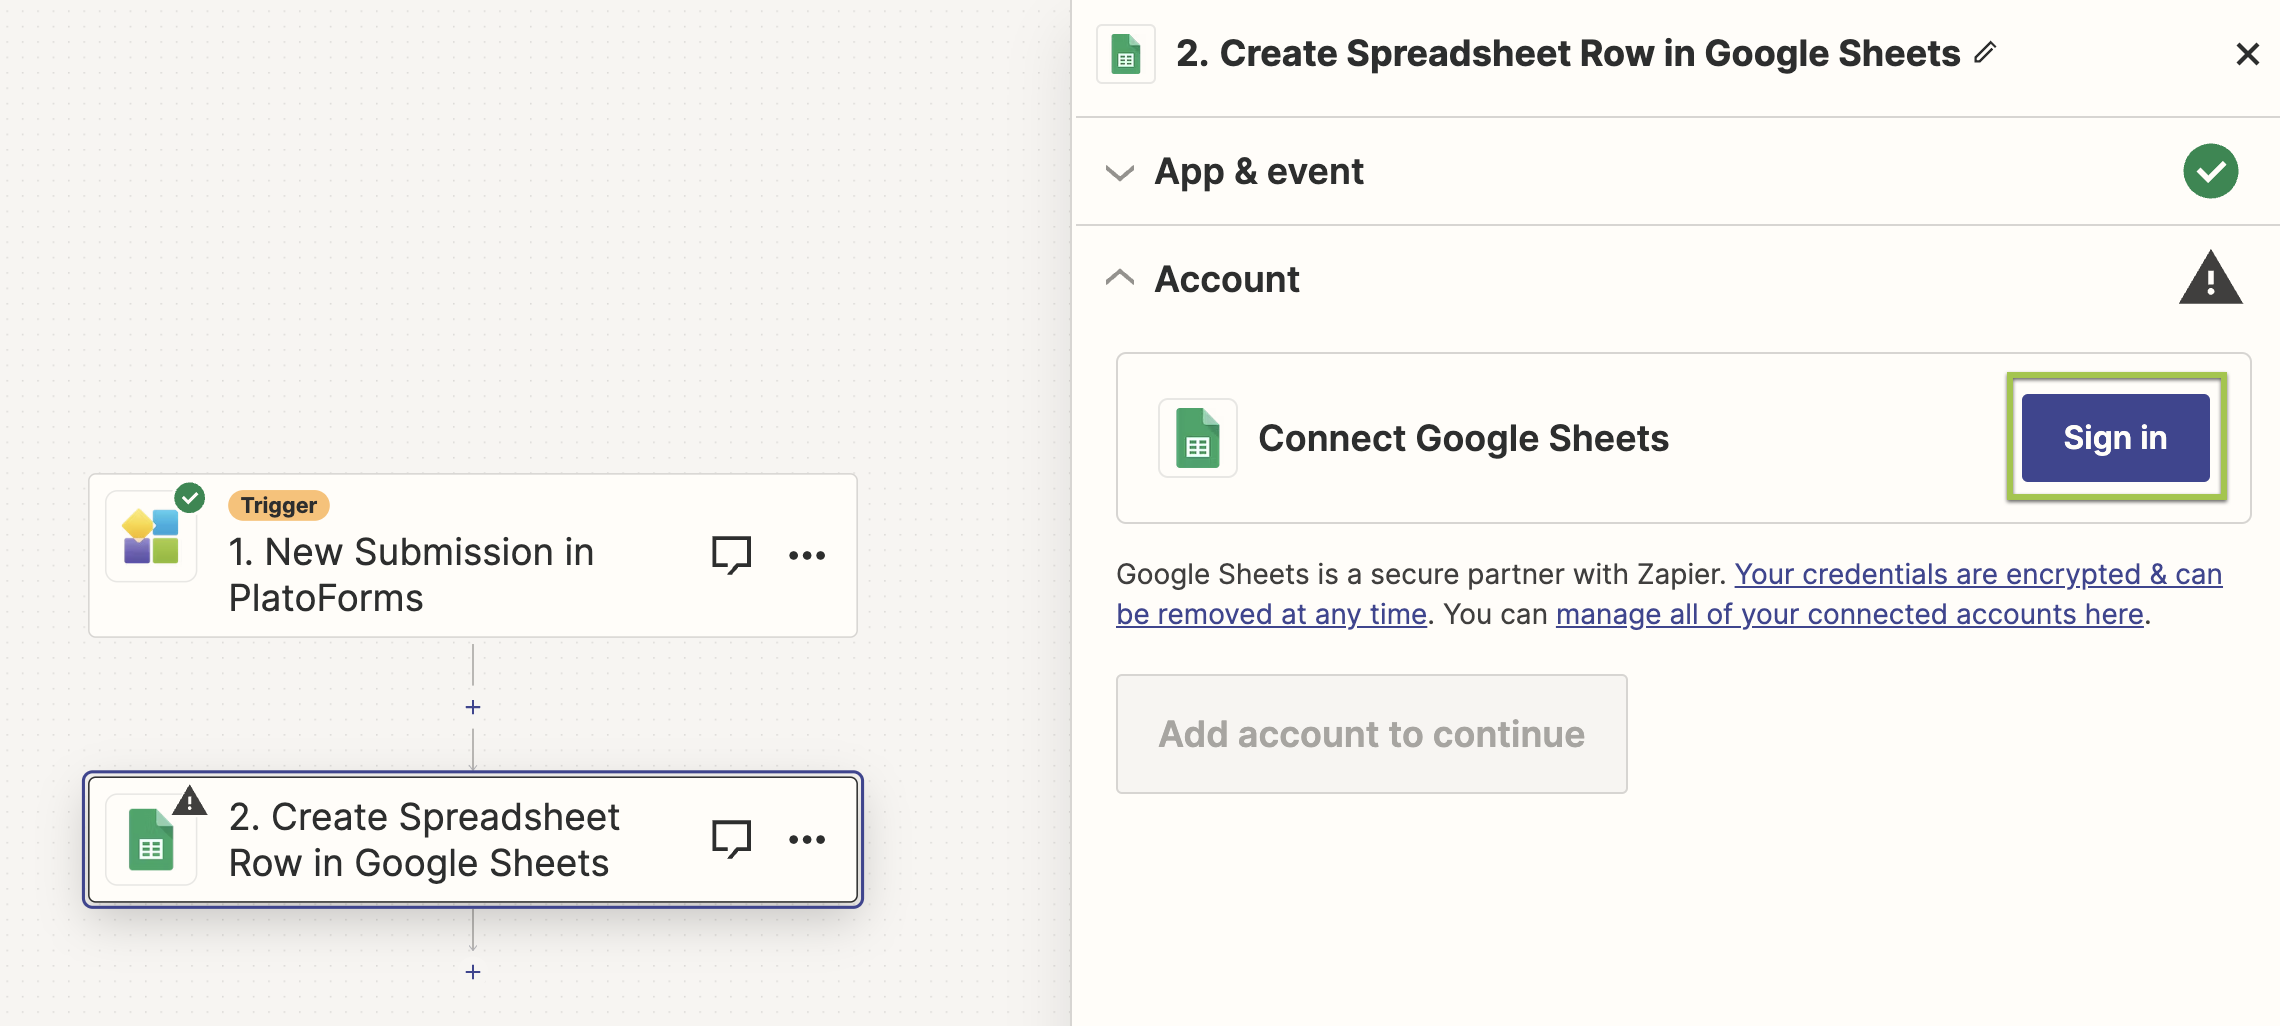
Sign in your Google Sheet.
-
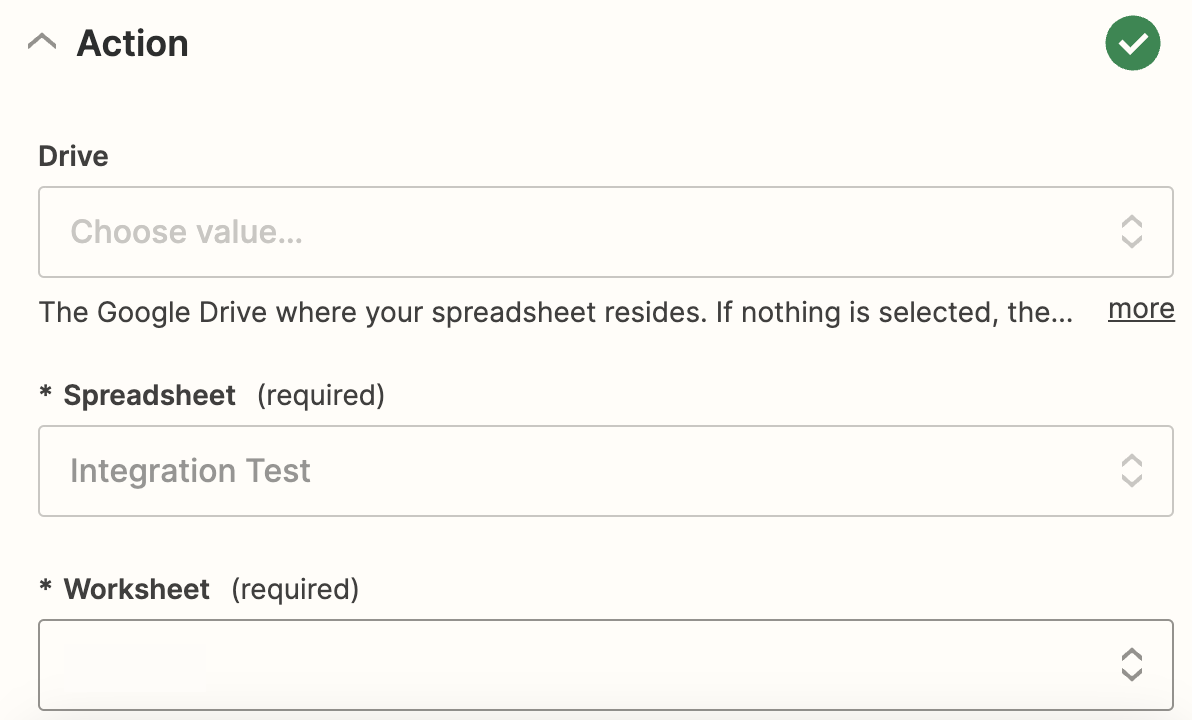
Choose the desired Google Sheet, map the fields to include, and send a test to see if it works.
-
Click Publish after confirming your settings.
Here’s a sample of the result:

Save form submission data to Google Sheets
This section provides you with a simple, step-by-step guide to create a zap that seamlessly uploads submission data to Google Sheets or PDF files to Amazon S3. You can explore all these features completely free of charge.
Before setting up this zap, ensure you’ve already created a Google Sheet with column headers. These headers should match the titles in your form data, such as email, address, phone, and submission date.
Connect your FormCan account
-
Click here to start.
NoteIf you don’t have a Zapier account, refer to the Integrate with Zapier section to create one.
-
Scroll down and in the search box, enter Google Sheets and select it.

-
Hover over to the FormCan trigger, and click Try It.

-
Follow the prompts to connect to your FormCan account.
Receive data
- At Set up FormCan Submission step, select the form you want to receive data.
Please ensure that form is published and it has at least one submission so that Zapier can get sample data in next step.
-
At Pick A Sample To Set Up Your Zap, press Pull in Samples. It will return up to 3 submissions.
-
Select Google Sheets to create an Action.
-
At Select Google Sheets Action step, select Create spreadsheet row.
-
Connect Google Sheets by your account.
-
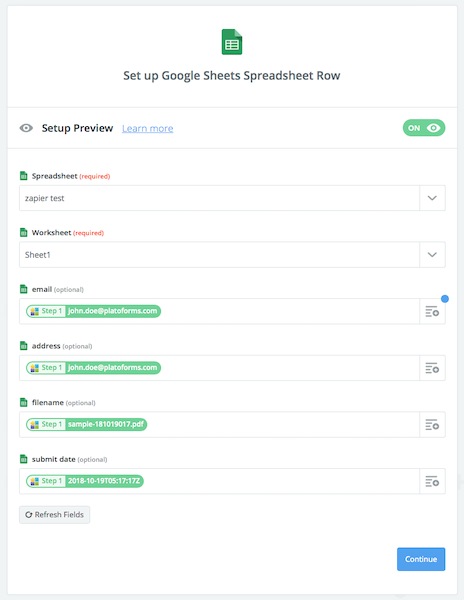
At Set up Google Sheets File step, select the
SpreadsheetandWorksheetyou created in advance. The fill the data by its column name. -
In test step, press Send Test to Google Sheets.
After it shows a success message, you can find the data in that google sheet file. -
Give a name and turn on your Zap.
Upload PDF to Amazon S3
Connect your FormCan account
-
Click here to start.
NoteIf you don’t have a Zapier account, refer to the Integrate with Zapier section to create one.
-
Scroll down and in the search box, enter Amazon S3 and select it.
-
Hover over to the FormCan trigger, and click Try It.
-
Follow the prompts to connect to your FormCan account.
Receive data
- At Set up FormCan Submission step, select the form you want to receive data.
Please ensure that form is published and it has at least one submission so that Zapier can get sample data in next step.
-
At Pick A Sample To Set Up Your Zap, press Pull in Samples.
It will return up to 3 submissions. -
Select Amazon S3 to create an Action.
-
At Select Amazon S3 Action step, select Upload File.
-
Connect Amazon S3 by your IAM Access Key.
-
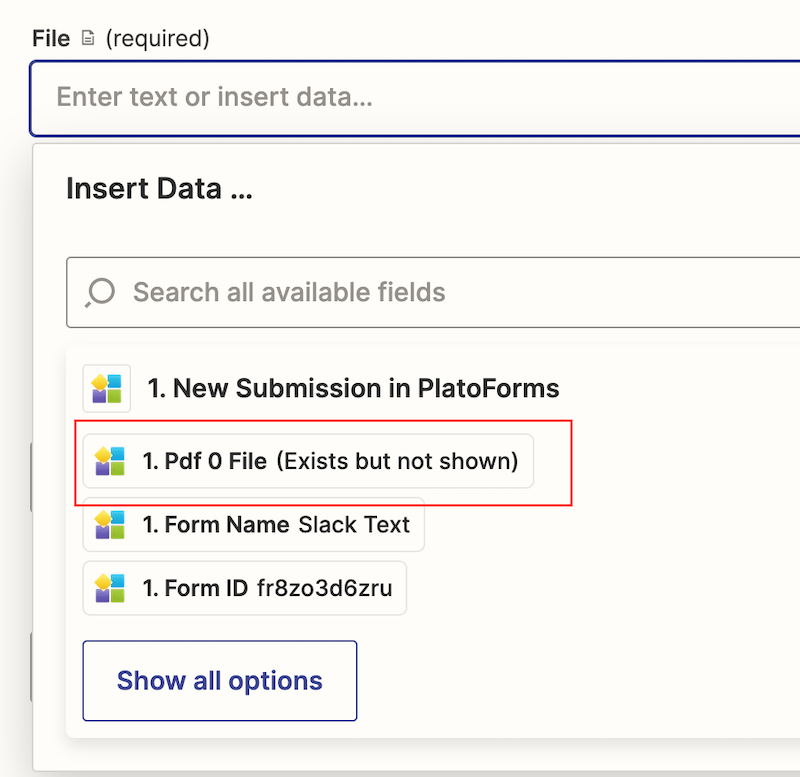
At Set up Amazon S3 Upload File step, Select the S3
Bucket.
NoteIn this example, we use PDF 0 Display Name as the
Key;File- it must be “PDF x File”, that “x” is a number that depends how many PDFs created in your form. For Master Form, your form can link multiple PDFs. In this example, it is “PDF 0 File”. -
In test step, press Send Test to Amazon S3.
After it shows a success message, you can find that file in your S3 bucket. -
Give a name and turn on your Zap.
Dig into the details
For seamless app connections, let’s delve into the specifics. FormCan transfers data to Zapier in four distinct categories:
-
Submission metadata: Includes submission ID, date, and form URL.
-
Files: Encompasses PDFs (including those from Master Form linking), attachments, and signature (in PNG format) if applicable.
-
Submit data: Represents raw submission data compiled as a list.
-
Data: Offers polished submission data in an easily readable format. Fields like dates are converted to human-readable
YYYY-MM-DDformat for clarity.
Visualize this with a sample payload:
{
        "id": "srf9c4436bdd4e40b0be913236e1c99342",
        "submit_date": "2018-10-19T05:17:17Z",
        "submit_revision": 1,
        "published_form_revision": 4,
        "submit_form_url": "https://form.formcan.com/fr3uffwodvi/?sid=srf9c4436bdd4a40b0be913236e1c99342&pver=4",
        "form": {
            "id": "fr3uffwodvi",
            "name": "sample.pdf"
        },
        "pdf": [
            {
                "id": "181019017",
                "file": "__THE CREATED PDF FILE___"
                "template_id": "pdwdt2zb1rp",
                "display_name": "sample-181019017.pdf",
                "name": "sample.pdf",
                "url": "https://api.formcan.com/v4/download/submission/pdf/srf9c4436bdd4ed0b0be913236e1c99342/pdwdt2zb1rp",
                "sharing_creator_url": "https://api.formcan.com/v4/sharing/submission/pdf/srf9c4436bdd4e40c0be913236e1c99342/pdwdt2zb1rp"
            }
        ],
        "attachments": [
            {
                "id": "sf8v45fiop8",
                "file": "__THE UPLOADED FILE___"
                "field_name": "fid16",
                "file_name": "gray.pdf",
                "url": "https://api.formcan.com/v4/download/submission/attach/srf9c4436bdd4s40b0be913236e1c99342/sf8v45fiop8",
                "sharing_creator_url": "https://api.formcan.com/v4/sharing/submission/attach/srf9c4436bdd4e40b0be913236e1c9934f/sf8v45fiop8",
                "size": "4155"
            }
        ],
        "data": {
            "Postcode": "123",
            "State": "NSW",
            "Date of Birth": "1980-12-06",
            "Signature": "__THE SIGNATURE PNG FILE___"
        },
        "submit_data": [
            {
                "id": "fid9",
                "type": "number",
                "label": "Postcode",
                "value": "123",
                "raw": null
            },
            {
                "id": "fid8",
                "type": "text",
                "label": "State",
                "value": "NSW",
                "raw": null
            },
            {
                "id": "fid5",
                "type": "date",
                "label": "Date of Birth",
                "value": "1233-12-12",
                "raw": [
                    {
                        "id": "0",
                        "value": "1233"
                    },
                    {
                        "id": "1",
                        "value": "-"
                    },
                    {
                        "id": "2",
                        "value": "12"
                    },
                    {
                        "id": "3",
                        "value": "-"
                    },
                    {
                        "id": "4",
                        "value": "12"
                    }
                ]
            },
            {
                "id": "fid16",
                "type": "FileUpload",
                "label": "Upload Attachments",
                "value": "sf8v45fiop8",
                "raw": [
                    {
                        "id": "0",
                        "value": "sf8v45fiop8"
                    }
                ]
            },
            {
                "id": "fid13",
                "type": "Signature",
                "label": "Signature",
                "value": "data:image/png;base64,iVBORw0KGgoAAAANSUhEUgAAAcgAAACwCA...",
                "raw": null
            }
        ]
    }
