Preview your form
Tabs
You can check your online form’s appearance and functionality before publishing. This helps you make any necessary adjustments to ensure your form is perfect when it goes live.
Preview your form
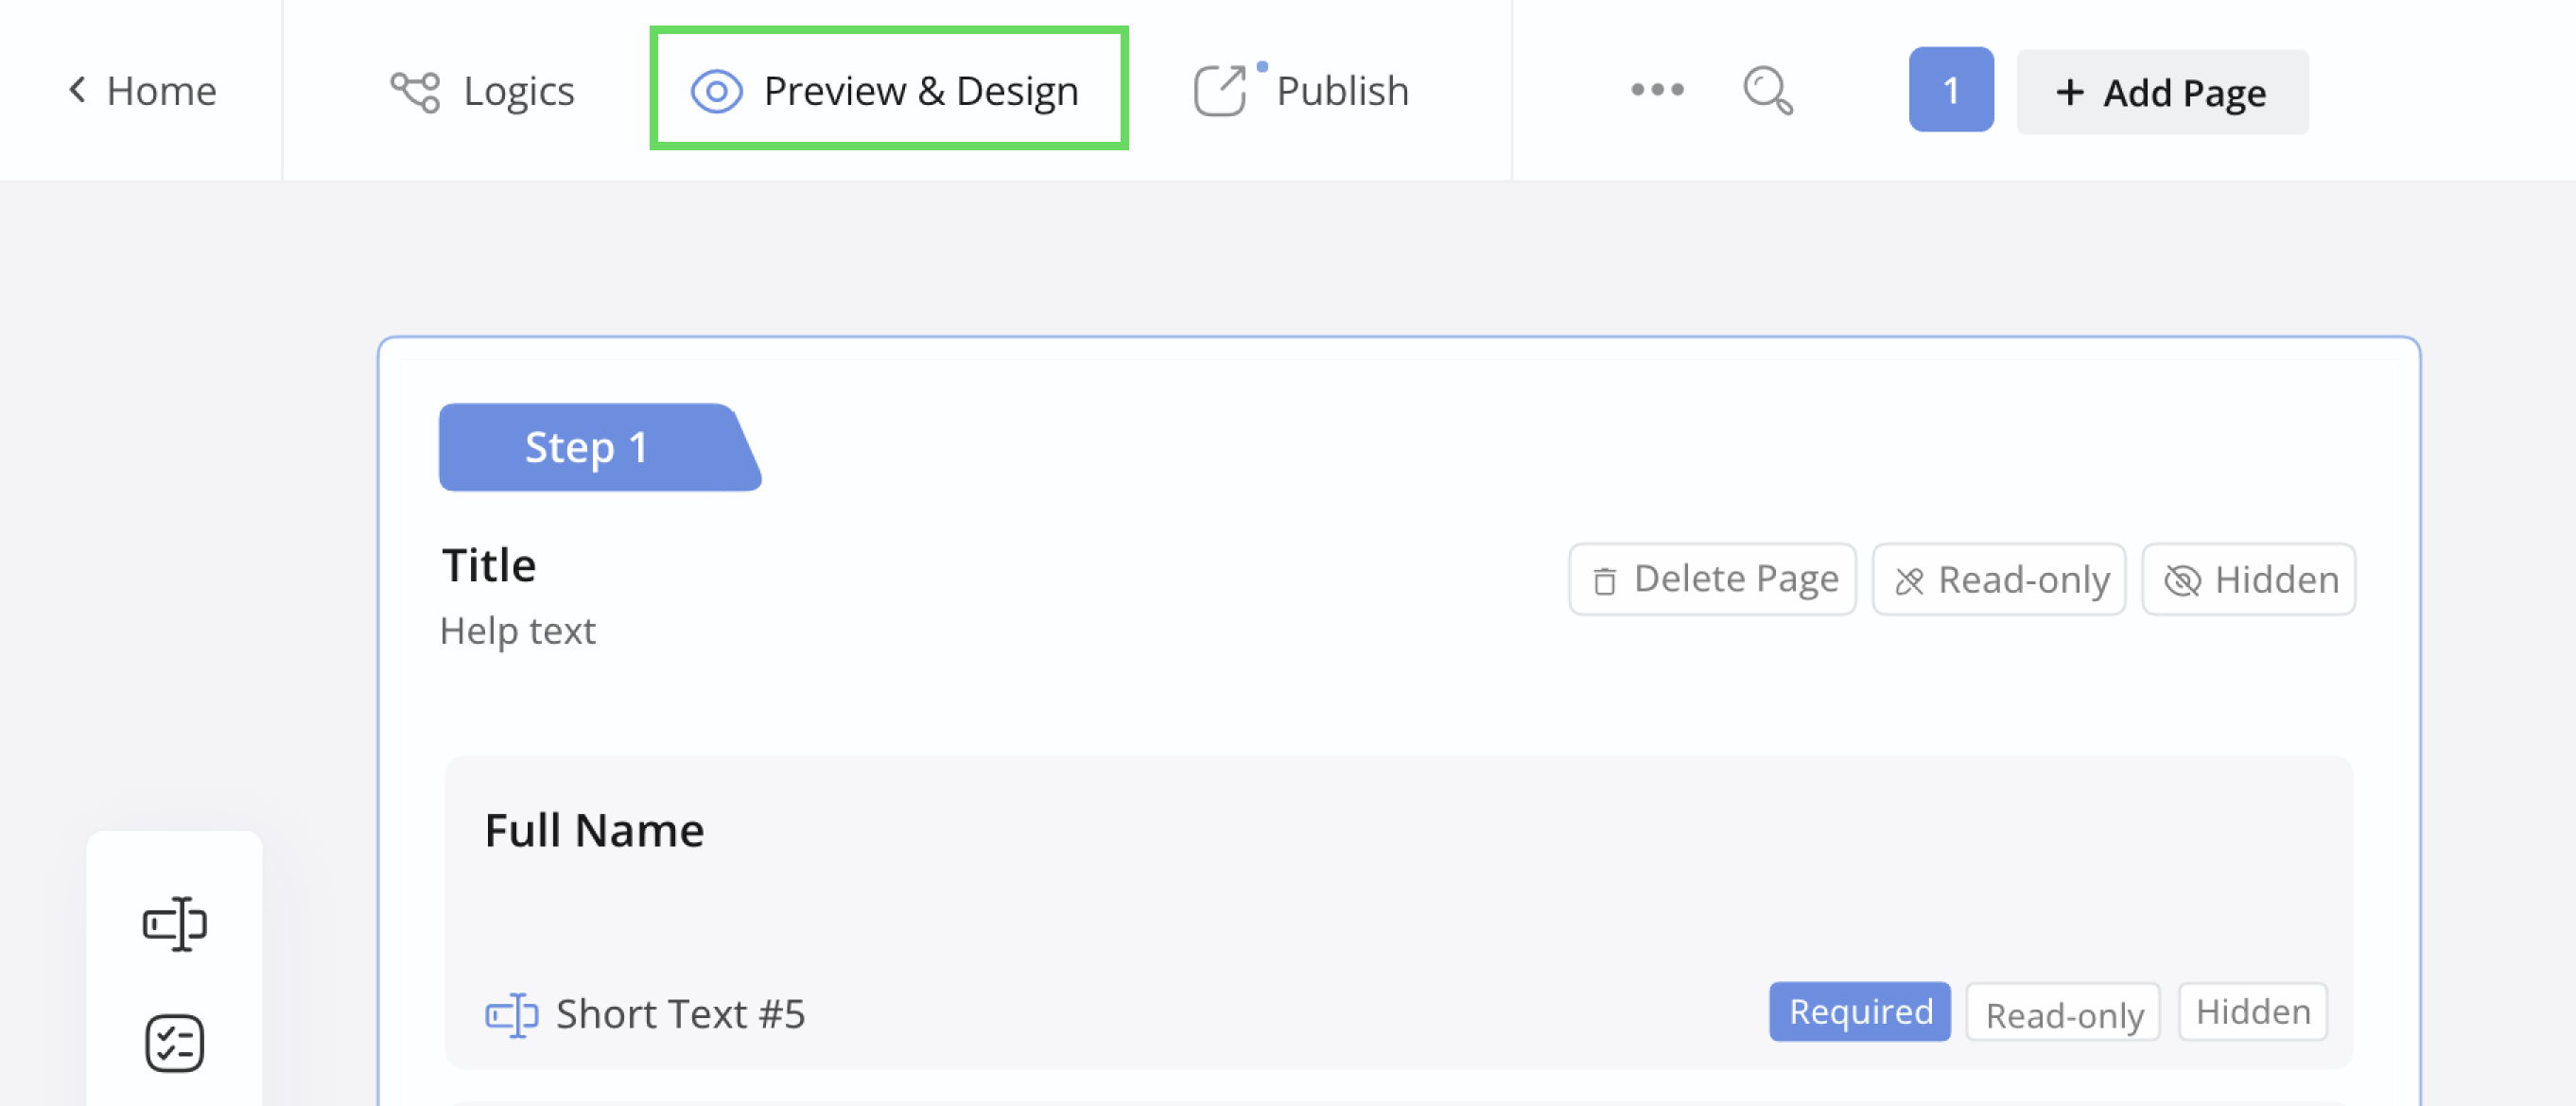
To preview your form, click the Preview & Design button in the top left corner.

In the form previewer, you can view your form in its final state. This enables you to fill out fields, submit responses, and test the form’s functionality just as if it were live.
Form validation
Form validation is crucial to verify user input accuracy. By default, the Form Validation Enabled button on the top right of the previwer is on.

-
When Form Validation Enabled is on: You can preview the form with validation constraints. Be aware that enabling it might occasionally cause preview issues.
-
When Form Validation Enabled is off: You can preview the form without validation constraints. This simplifies assessing layout and functionality.
Add and preview sample data
Using sample data during the form-building process helps you fine-tune the presentation and layout of your form, ensuring it meets your requirements before you publish it.
To add and preview sample data in your form, follow these steps:
-
Hover over the field you want to add sample data.
-
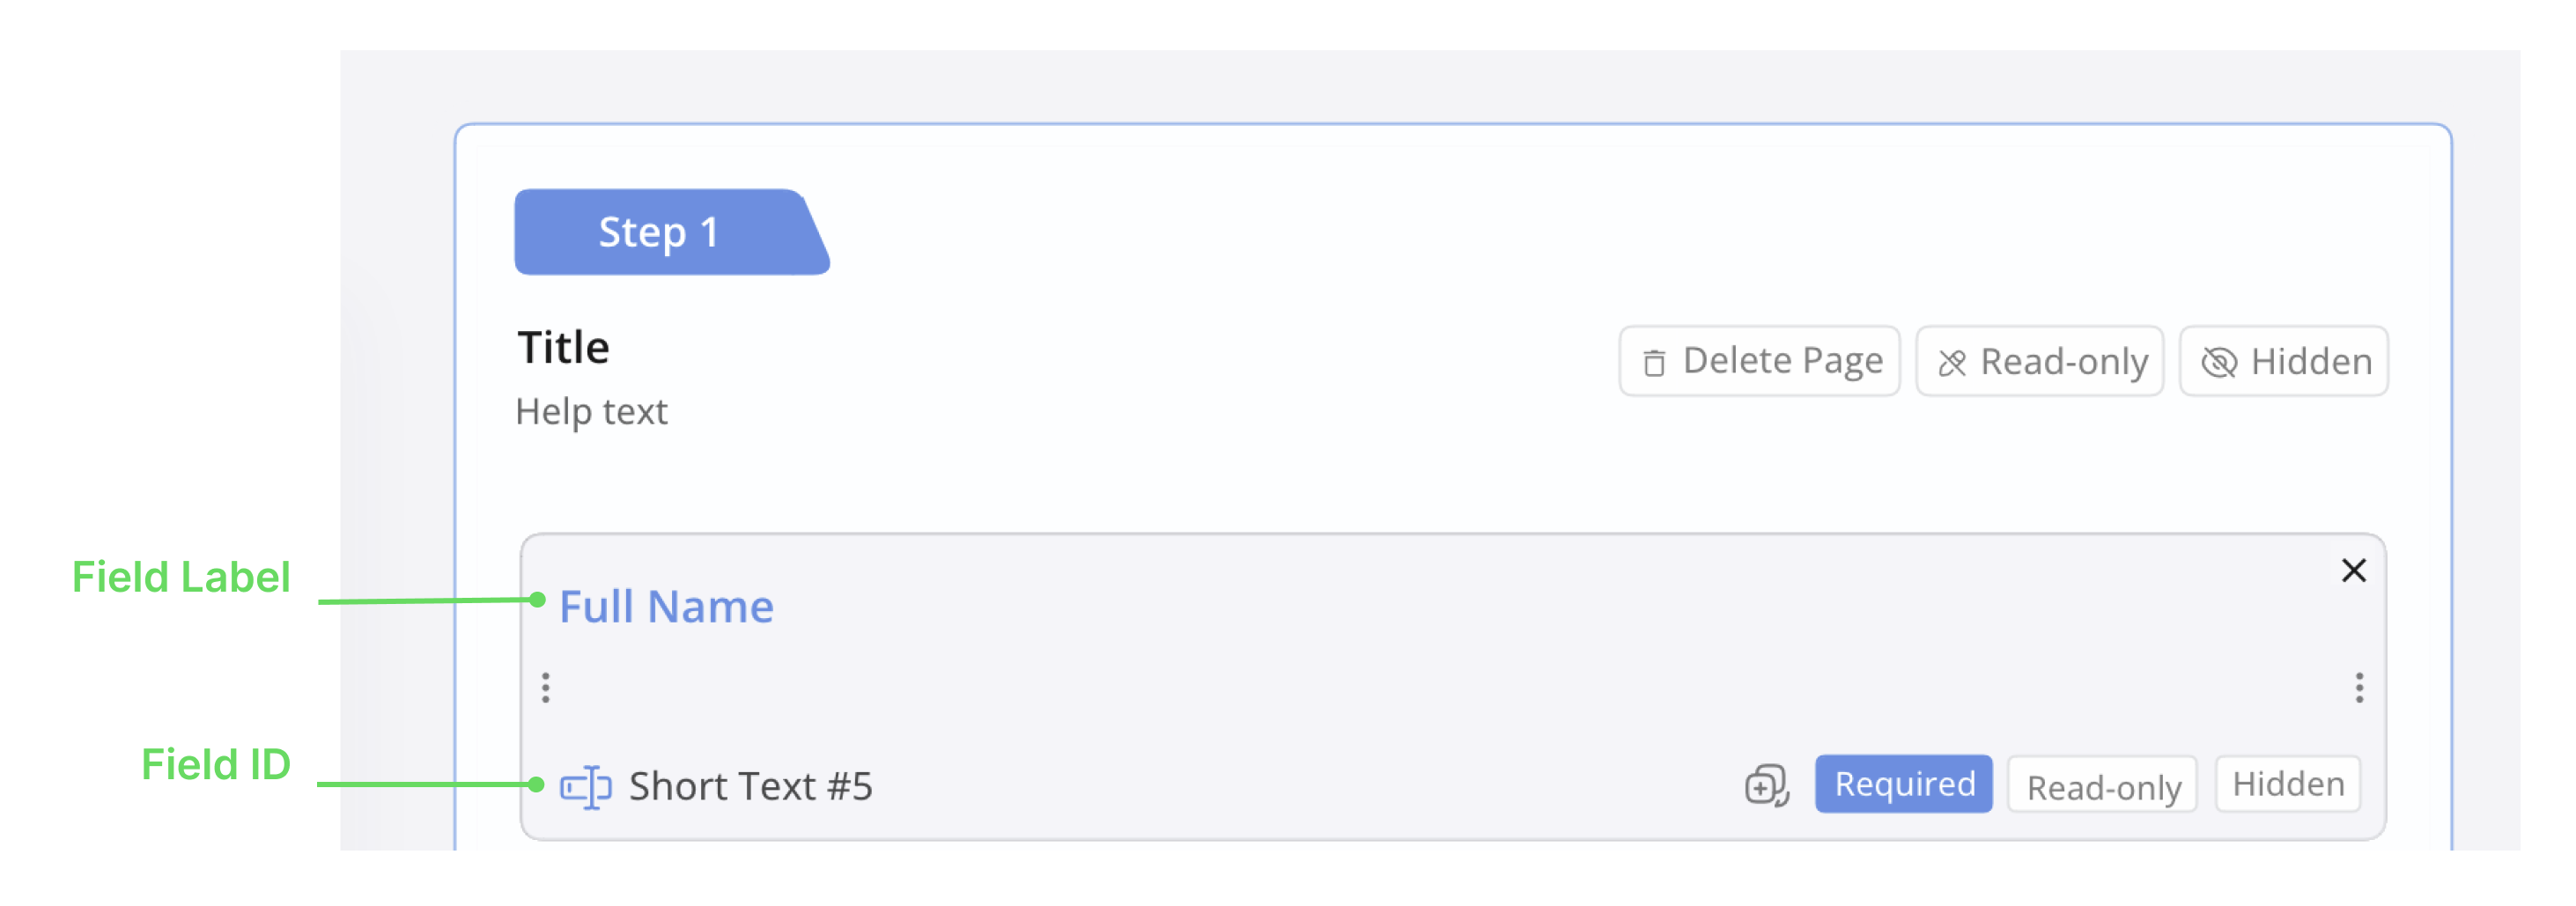
Click the Field Label or Field ID to open its attributes panel.

-
Scroll down the field attributes panel, and enter the sample data under the Preview section.

-
After entering in all your sample data, click Preview & Design to open the preview page.
-
On the preview page, click Fill Sample Data, and the fields will automatically populate with your sample data.
Sample data cannot be included for Field Upload, Photo, Video, Embed, Decorative Image, and Stripe Payment fields. Thus, to preview how these fields will appear in the form, you can manually upload files or photos after entering the preview mode.
Sample and default selections
There are two important options to consider for Choice and Dropdown fields:
-
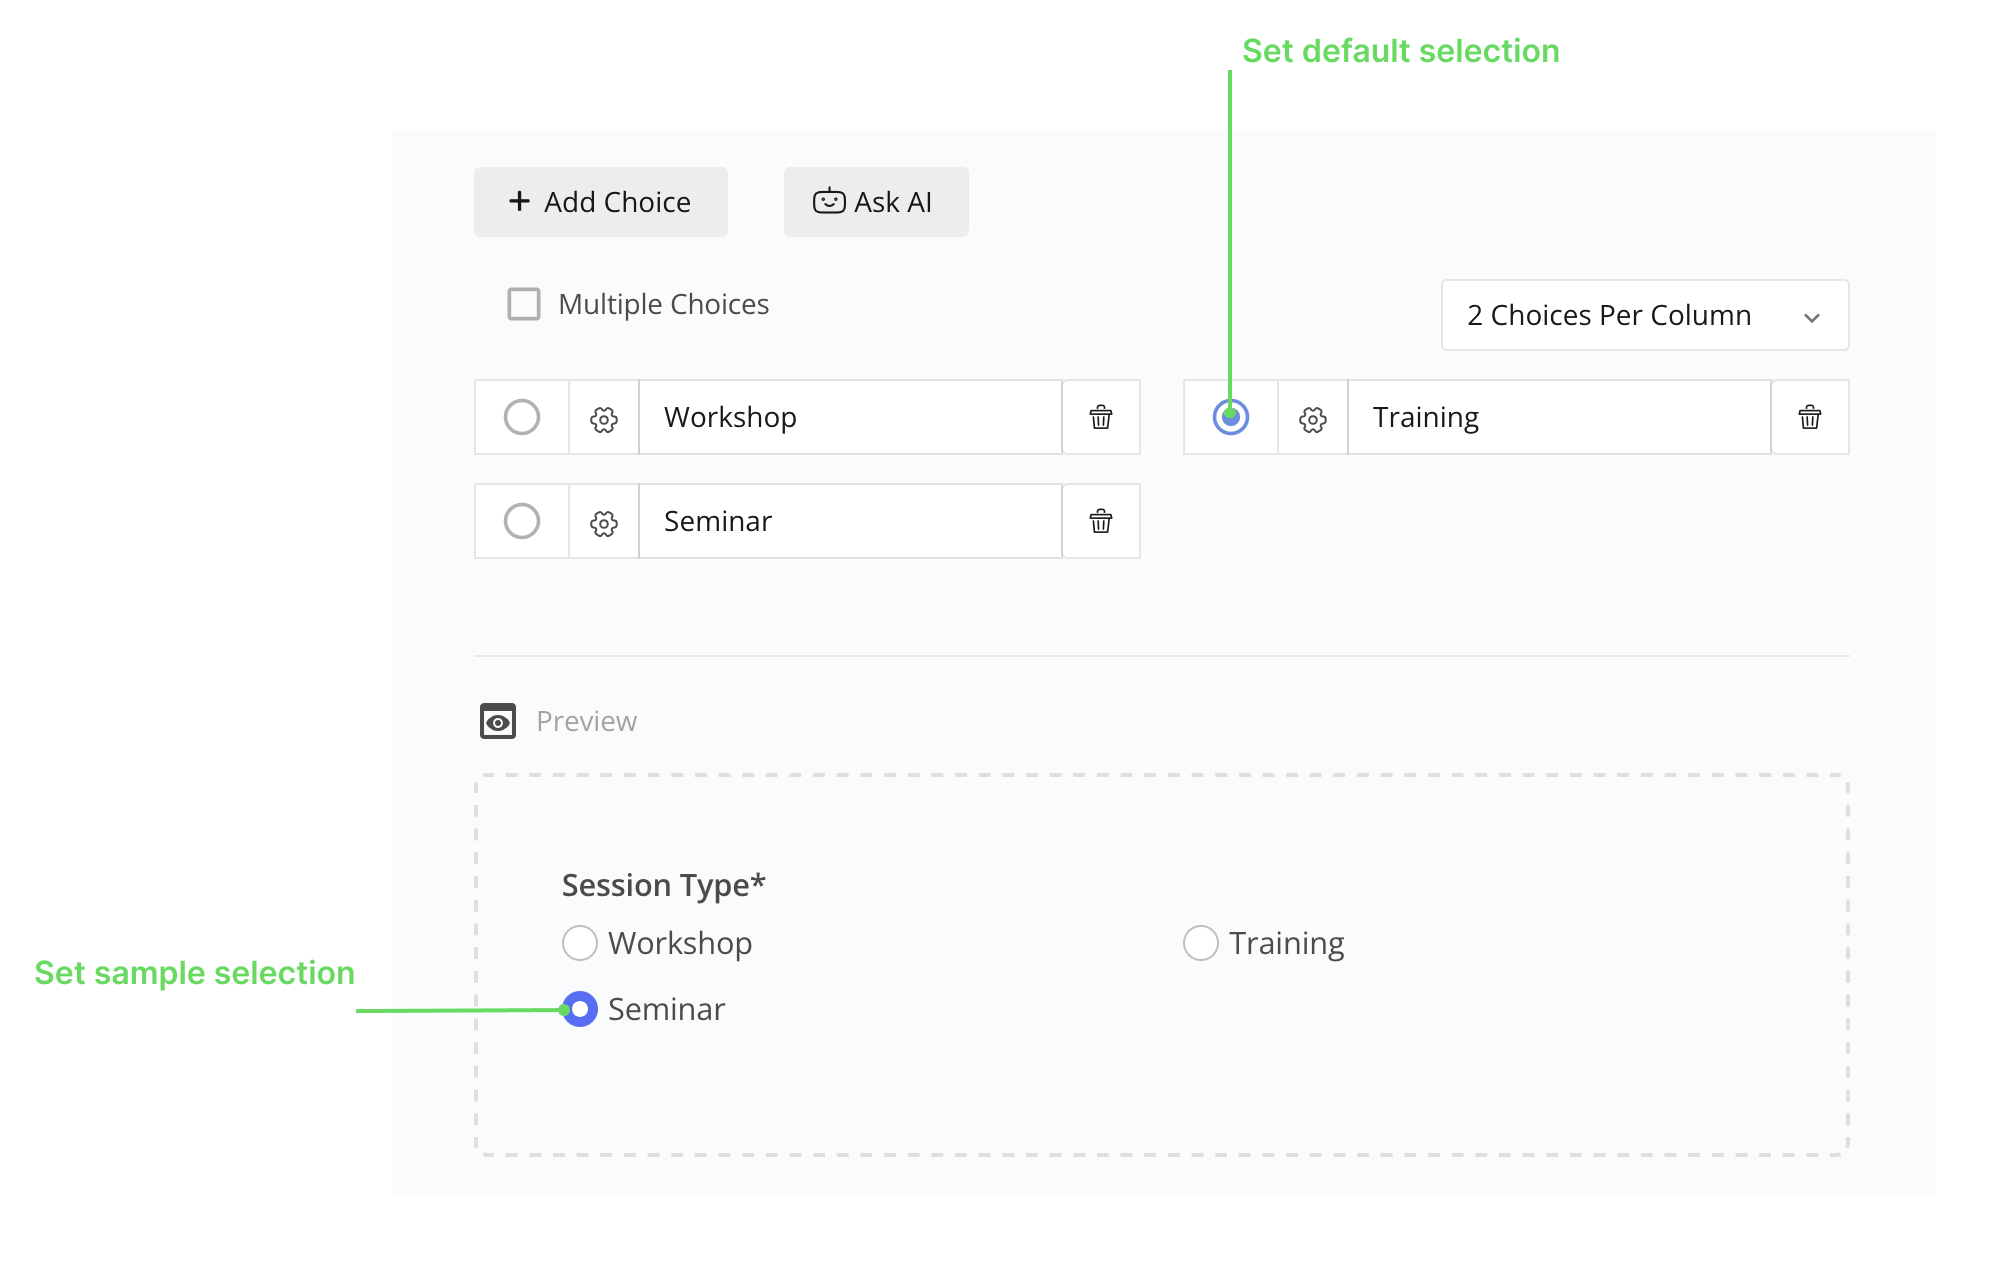
Sample options: When you preview the form and use the “Fill Sample Data” feature, the selected option(s) on the preview page represent the sample selection. For example, if you have options like “Weekly” and “Monthly” set as sample selection, clicking “Fill Sample Data” will pre-select both “Weekly” and “Monthly” options.
-
Default options: The default selection is the option that is automatically chosen when the form is initially loaded or opened. It is independent of the sample data and represents the pre-selected option without any user interaction.

